
Fermenting
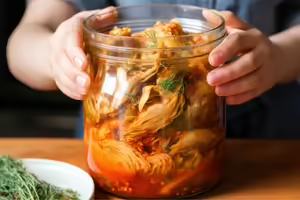
Fermentation has been used for thousands of years to preserve food and beverages. It's safe, easy, and economical. Microorganisms like yeast, bacteria, and mold play a role in the fermentation process, creating nutritious foods and drinks such as: Beer and wine, sourdough bread, sauerkraut, kimchi, yogurt, chocolate, pickles, tempeh, koji, and miso.
How Fermenting Works
There are three main types of fermentation, producing an industry of fermented products: alcohol (wine, beer), acetic acid (vinegar, kombucha), and lacto-acid (sauerkraut, kimchi, yogurt).
Fermentation Process
Fermented products process best at temperatures between 68 to 72 F. That process takes between three to four weeks to complete under ideal conditions. If the temperature is too high, spoilage bacteria may take over, ruin the product, or produce a less flavorful result. If the temperature is too low, the process may take six weeks or longer.
After fermentation is complete, store products in the refrigerator; store products in a cool, dry place if it has been safely canned. Shelf life for frozen and refrigerated fermented foods depends on the food and based on quality. For canned foods, most products canned properly are of the best quality for up to one year.
Title
Preparation
Wash containers, equipment, and food contact surfaces with hot soapy water before you begin. Sanitizing is another crucial step. If chlorine bleach is used, the equipment should be rinsed thoroughly to remove any residues that may inhibit the growth of fermenting bacteria. Boiling containers for 10 minutes is also a safe method for sanitizing.
Use Quality Salt
Salt used in fermentation should contain no additives. Canning or pickling salt is recommended since it contains no impurities and has a consistent granular size and weight.
Functions of Salt in Fermentation Process
- Pulls needed water and sugars from vegetables.
- Aids in the growth of fermenting bacteria over spoilage bacteria, yeasts, and molds.
- Allows for crispier vegetables by hardening the plant pectin and decreases the activity of pectinase, an enzyme that makes vegetables mushy.
- Slows the fermentation process, allows longer fermentation times, and decreases the chance of undesirable mold growth.
- Gives flavor to the final product.
Salting Methods

Dry Salting
Salt is added directly to the vegetables. After mixing in the salt, leave the mixture for 20 to 30 minutes to allow for natural juice extraction. Massaging salted vegetables helps to speed up the process and usually takes 10 to 15 minutes to get enough liquid pulled out to cover the vegetables in the fermentation vessel.
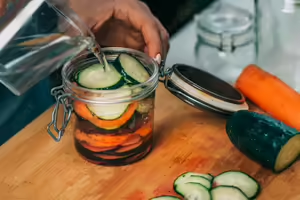
Brining
Brining is best for whole or quartered pieces. Mix salt and water to form a brine before adding to the vegetables. This technique can allow for better coverage of the vegetables, lessening the risk of fermentation failure. If there isn’t enough brine to cover the vegetables from dry salting, make additional brine by mixing 1 quart water with 1-½ tablespoons salt.
Brine Concentrations
While a 3% brine solution is generally safe for shredded vegetables, whole and large pieces of vegetables should be fermented using a 5% brine solution. Always weigh the amount of salt for accuracy and mix it with water to achieve the desired concentration.
- 3% solution: Mix 1 quart of water and 2 tablespoons (1 ounce or 27 grams) of salt.
- 5% solution: Mix 1 quart of water and 3 tablespoons (1.6 ounces or 45 grams) of salt.
Prevent Spoilage
Exposure to oxygen can encourage and allow for both mold and yeast to grow, so it is critical for vegetables to remain submerged during the fermentation process to prevent spoilage. Fermenting products should be kept 1 to 2 inches below the surface of the brine. If the fermented product is slimy or smells spoiled or rotten, discard it. Clean and sanitize the container thoroughly and try again.
- Use a jar with an airlock lid.
- Keep food submerged below the brine level.
- Control room temperature, keeping it ideally between 68 to 72°F.
- Select fresh, firm vegetables free of spoilage.
- Use the correct amount of salt.
- Clean and sanitize equipment; wash hands and surfaces often.
Storing Product
Watch for signs to know when the product is ready to move into cold storage. Once fermentation is completed, store the finished product either in the refrigerator or in a cool, dry location or process in a boiling water bath canner.
- Bubbling: Fermented products should have bubbles in the brine mixture as a result of the gas produced by the lactic acid bacteria.
- Aroma: Fermented product should have a pleasant, yet slightly sour, aroma. If it smells spoiled or rotten, discard it.
- Taste: Depending on the type of vegetables used, there will be varying ranges of flavors. Generally, for a less sour product, use a shorter fermentation time; allow vegetables to ferment longer for more tang. Expect subtle changes in flavor even during refrigeration as the process slowly continues.
Sources
References
- Vegetable Fermentation, Joell A. Eifert, Food Safety Extension Agent, Virginia Cooperative Extension, Renee R. Boyer, Associate Professor
- Food Science and Technology, Virginia Tech, Robert C. Williams, Associate Professor, Food Science and Technology, Susan S. Sumner, Associate Dean Academic Programs, College of Agriculture and Life Sciences
- Breidt, F., McFeeters R. F., Perez-Diaz I., and Lee C. 2013. Food Fermented Vegetables Microbiology: Fundamentals and Frontiers, 4th Ed. Edited by M. P. Doyle and R. L. Buchanan: ASM Press, Washington, D.C.
- USDA. 2009. USDA Complete Guide to Home Canning, Guide 1: Principles of Home Canning. U.S. Department of Agriculture National Institute of Food and Agriculture. Agriculture Information Bulletin No. 539.