Homeowner's Guide to Solar Energy
This guide will take homeowners through every step of transitioning to solar energy, from understanding your energy needs to preparing for installation to understanding what happens during and after the setup. It also includes surplus energy production and net metering, system maintenance, and a moving FAQ.
Before Going Solar
Before you begin your solar journey, consider how long you plan to stay in your current home. If you’re thinking of moving soon, be sure to check out the Moving with Solar Panels FAQ below for helpful tips.
Understand your home’s energy use.
- Review your electricity bills: Gather the last 12 months of electric bills and calculate your average daily usage in kilowatt-hours, kWh. The standard range for solar home systems is 5-10 kWh.
- Get a home energy audit: Request a professional energy audit from your utility, or conduct your own home energy audit to identify opportunities to save energy before going solar.
Reduce energy use and improve efficiency.
- Efficiency first: Identify and complete energy-efficiency upgrades before installing solar. This could include insulation, sealing air leaks, or upgrading windows.
- Upgrade appliances: Replace outdated appliances with energy-efficient models. Look for the EnergySTAR label.
- Consider heat pumps: If your heating and cooling system is due for a replacement, energy-efficient heat pumps can significantly reduce electricity usage.
Check out energy efficiency tips from Safe Electricity for ideas on lowering home energy use.
How to set up a home solar energy system.
There are four steps to follow as part of setting up a solar energy system at home:
- Choose your type of solar energy system.
- Check your roof for solar readiness.
- Estimate the size of your solar energy system.
- Plan for how you’ll pay for your solar panels.
- Follow the regulatory processes.
- Find a solar installer.
1. Choose your type of solar energy system.
Deciding early on if you want to integrate battery storage is important. Even if you don’t install it now, considerations need to be integrated early on to make it possible later. This can also help determine the size of the solar energy system. The image below shows the three solar energy system options: Grid-connected, grid-connected and battery storage, and off-grid.
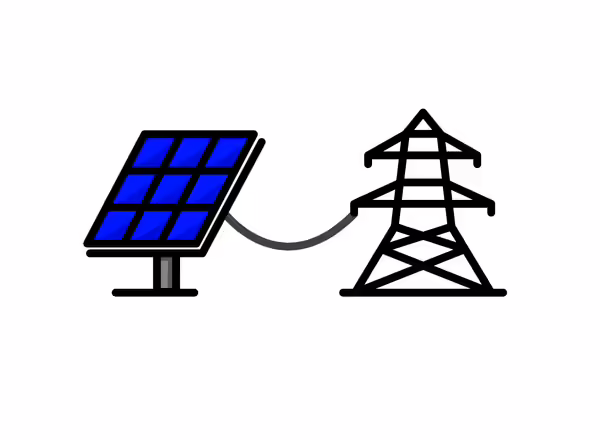
Grid-Connected
Solar panels are directly tied to the grid (top right). During the day, solar energy is used first. If the panels produce more than is needed, the excess is sent back to the grid, often earning credits through a system called net metering. Read more about net metering below.
During a power outage, this solar system automatically shuts down. This safety feature prevents electricity from flowing back into the grid, which could put utility workers at risk while they complete repairs.
For grid-connected systems, the solar panels do not need to generate 100% of your home’s energy usage. Making your generation goal between 50-75% of your annual electricity usage is a good place to start, since electricity usage varies by season and time of day.
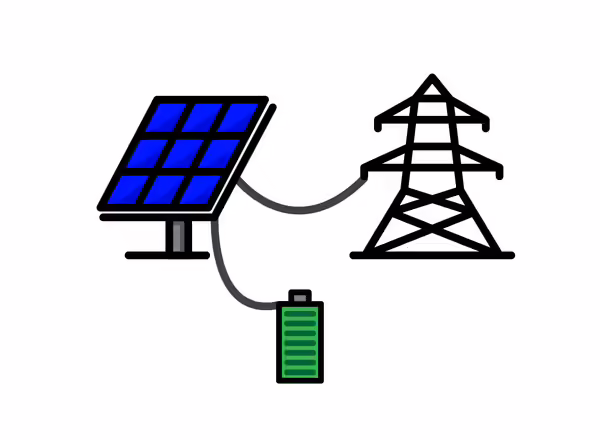
Grid-Connected and Battery Storage
Solar panels are still connected to the grid, but the battery can store excess energy (middle right). If there’s a power outage, the system automatically disconnects from the grid and continues to operate independently. The battery provides backup power, and the solar panels can keep charging it throughout the day.
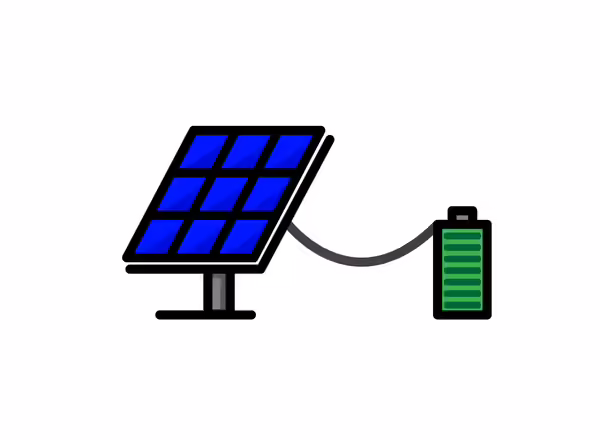
Off-Grid
Completely independent from the grid (bottom right). It relies entirely on solar panels and batteries to supply electricity. This requires careful planning to ensure energy needs are met year-round. Unless you’re in a rural or remote area, this is uncommon.
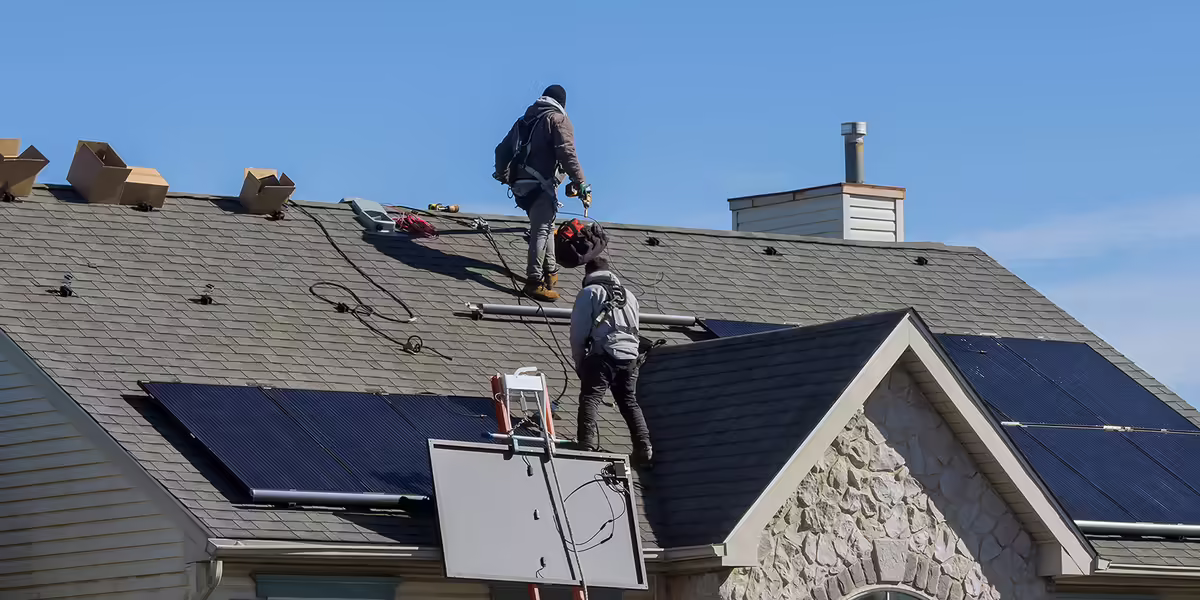
2. Check your roof for solar readiness.
Roof age: Solar panels last 15 to 20 years. If your roof will need replacing soon, consider upgrading it before installing solar to avoid extra costs later.
Sun exposure: Ensure your roof receives enough sunlight year-round. South-facing roofs without significant shading are ideal.
3. Estimate the size of your solar energy system.
Use this formula to estimate the system size needed to meet your solar generation goal:
System Size (kW) × Peak Sun Hours/Day × 365 Days × Panel Efficiency (0.80) = Annual kWh Production
Example Inputs for Illinois:
- Peak Sun Hours: 4 to 4.5 hours/day
- Efficiency Factor: Use 0.80 to account for long-term panel degradation (20%), shading, snow, and hot weather
- Annual kWh Production: Multiply your average annual energy usage by your desired offset percentage (e.g., 0.75 for 75%)
To find system size (kW): Rearrange the formula
System Size (kW) = Annual kWh Production ÷ (Peak Sun Hours × 365 × 0.80)
4. Plan for how you’ll pay for the solar panels.
There are three main options available to municipalities and individuals to pay for solar.
- Buy outright: You own the system and get the full financial benefits. This means you can claim tax credits, rebates, and other incentives that come with solar ownership. While the upfront cost can be high, in the long term, you keep all the energy savings. See below for more information about surplus energy production and net metering.
- Lease: A third party owns the system, and you pay a fixed monthly amount for the system. Solar lease payments are designed to be lower than your pre-solar electricity bill, saving 10% to 30% on monthly energy payments. This allows you to benefit from solar without the upfront cost, but you don’t receive tax credits or rebates. The third-party owner can claim those incentives.
- Power purchase agreement: You pay for the electricity the system produces, typically at a rate lower than your utility’s. A third-party developer installs, owns, and operates the system on your property, and you agree to buy the power it produces. Like leasing, you don’t receive tax credits or rebates; those go to the third-party owner.

Net Metering in Illinois
The net metering program allows Illinois residential customers of Ameren, ComEd, and MidAmerican to receive credits for generating excess electricity from renewable energy sources. When you produce more electricity than needed, the surplus is sent back to the grid, and you receive credits that offset your utility bill.
Customers of municipal utilities or rural electric cooperatives should contact their suppliers to see if they offer net-metering. They may limit net metering access or offer a different approach for credits. The Illinois Climate and Equitable Jobs Act requires them to publish their net metering policies.
Full Retail Net Metering
Before Jan. 1, 2025
Under the previous system, customers received a 1:1 credit for every kilowatt-hour (kWh) of electricity generated by their solar panels or other renewable sources. These credits applied to the supply, delivery, and taxes/fees of the electric bill.
Customers who enrolled in this system before the change will continue to receive credits for the lifetime of their system. If you had net metering prior to Jan. 1, 2025, you will still be in the program and will retain these benefits.
Check with your utility provider for specific requirements on the new rebates and how they affect your net metering rate.
Supply Only Net Metering
After Jan. 1, 2025
Starting Jan. 1, 2025, new rules change the way credits are applied. Now, customers will only receive credits for the supply portion of their bill for excess energy sent back to the grid. This means you’ll still receive some compensation, but it will not cover the full bill like it used to.
Distributed Generation/Smart Inverter Rebate: To qualify for a smart inverter rebate, your system must use a smart inverter that helps transfer electricity from your solar panels to your home. Customers can receive a rebate from the utility of at least $300 per installed kW of solar capacity, provided all required paperwork is submitted within 60 days. There is a similar rebate for installing energy storage/batteries with renewable energy generation.
Credits Roll Over Monthly: One benefit of the new system is that net metering credits will no longer expire at the end of the year. Instead, they will roll over from month to month, allowing you to accumulate credits during the sunny summer months to offset higher winter bills when your system generates less energy.
Regulatory Processes
You’ll need to work with your utility and local government to make sure the system is interconnected to the grid, and that the right permits are secured.
1. Submit an interconnection application to your utility company.
The application includes the technical specifications of the solar system and compliance with net metering requirements.
2. Check with your city or county offices to verify what permits are needed.
Whether you live in town or a rural area, it is likely that permits will be needed prior to the installation of your solar array. Permits vary by jurisdiction.
3. Permits may vary depending on whether the array is a roof- or ground-mounted system.
Types of permits can include building permits and electrical permits. In rural areas, building permits are sometimes referred to as zoning permits to indicate that the permitted use is allowed in your property’s zoning district.
4. Check with your solar contractor about permits.
Generally, the solar contractor will acquire the necessary permits, but make sure to clarify this with them or ask that the responsible party for the permits be named in the contract.
If the contractor states it is your responsibility to acquire the permits, you will need to get documentation from the contractor to submit with the permit application(s). Typical documentation includes:
- A one-line diagram of the electrical components
- Specifications for the solar panels that will be installed on your property
- A site plan showing the location of the array–this is typically needed even if the array will be roof-mounted. The site plan will show how close a ground-mounted array is to the property lines or what structure a roof-mounted array is being placed on.
5. Review the standards for solar installation in your city or county.
Familiarize yourself with the standards for solar installation in your city or county. Regardless of whether you acquire the permits or the contractor does, if some component of the installation is in violation of the community’s code of ordinances, it will fall back on the property owner to remedy the issue.
6. If you are part of a homeowners' association, you may need to obtain an approval letter.
The Homeowners’ Solar Rights Act protects homeowners' rights to install solar panels if your home is subject to a homeowner’s association, common interest community association, or condominium unit owners' association. If your property is subject to one of the above associations, you may need to obtain an approval letter.
5. Find a solar installer.
Obtain bids from several contractors.
Request quotes from at least three certified solar installers. Consider the price, equipment quality, warranties, and customer reviews.
Compare costs by calculating the price per watt.
Here is an example of how to get an apples-to-apples comparison between two systems, a 5 kW and a 6 kW:
- System A: 5 kW (5,000 watts) system priced at $15,000
$15,000 ÷ 5,000 watts = $3.00/watt - System B: 6 kW (6,000 watts) system priced at $17,000
$17,000 ÷ 6,000 watts = $2.83/watt
Schedule a professional site assessment.
This evaluates roof orientation, pitch, and structural integrity, and accounts for local weather patterns and shading issues.
Final Steps
- Final Inspection: Your local building department must inspect the system to ensure it meets Illinois state electrical codes and safety standards.
- Utility Interconnection: Once approved, your installer will coordinate with the utility company to install a bi-directional meter (to measure electricity sent to and drawn from the grid) and finalize the connection to the grid.
- This process typically takes up to 10 business days after inspection approval
Solar System Maintenance
Panels require minimal maintenance over their 20-30+ year lifespan. Panels are usually installed at an angle that allows snow to slide off naturally, but in areas with heavy snowfall, manual removal may be needed to maximize winter performance.
Most modern systems include online monitoring tools that allow electricity production to be tracked in real-time. Routine inspections every 1-2 years by a qualified technician are recommended to check wiring, inverter performance, and panel condition.
What if I move after installing solar panels?
Do you own or lease the system?
Ownership usually makes resale easier, as you can include the system in the home sale. If you lease or have a Power Purchase Agreement, you’ll need to coordinate with the solar company, and potential buyers may need to qualify to take over the agreement.
Is your new home suitable for solar?
If you’re thinking about relocating the system, ask whether your new roof is structurally and directionally suitable. Also, consider whether the local climate and incentives support solar. In many cases, it’s more practical to leave the system in place.
What are the costs and risks of moving the panels?
Physically relocating a system can be costly and might damage your panels or your roof. Keep in mind that holes from mounting equipment may be visible after removal, or discolored shingles.
Will solar help or hurt your home sale?
A well-maintained solar system can be a selling point and may increase your home’s value. However, buyers unfamiliar with solar may have questions about maintenance, warranties, or agreements. Having clear documentation and recent performance data can help.