Sometimes a tree becomes a hazard
This is the time of year I prefer to take down any trees that have died or become a hazard in the garden. I say “prefer” because sometimes you don’t have the luxury of waiting. I experienced this last year when a large tree lodged over as a result of heavy rains and saturated soil conditions. The main reason I like to wait for winter, if possible, is most of the landscape around the base of the trees is dormant and is less likely to be damaged by falling limbs or foot traffic. The other reason is there are no leaves on the tree, making cuts more visible, plus the limbs are a whole lot easier to handle.
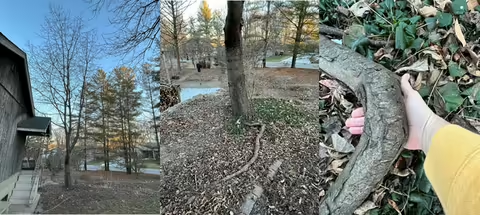
Two years ago, I noticed my standard sweet cherry tree was leaning out over a retaining wall, and we decided to remove some large limbs on the north side to alleviate some of the weight and hopefully stop the leaning. Unfortunately, our efforts weren’t successful, and the leaning has increased to the point the roots are being pulled to the surface and the tree is losing its anchorage. It’s hard to lose a tree that is otherwise healthy, but safety concerns demand its removal.
What was shady is now sunny
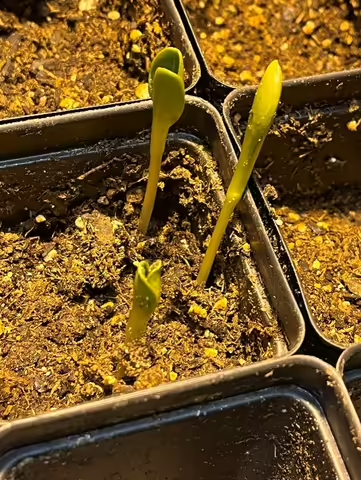
Once the tree is gone, what was once a shady area will now be a sunny area and I have already decided to plant artichokes until I come up with a more permanent plan. I have never found an artichoke cultivar that is reliably winter hardy (USDA Zone 7-10), so I am using an early maturing cultivar like ‘Tavor’ (84 days) and treating them like annuals. So far, I have them seeded and up with the aid of a heating mat. I just need to time their transplanting to avoid a freeze event, while still exposing the plants to at least 10 days of temperatures around 45-50°F in order to induce budding.
Soil blocking reduces plastic use
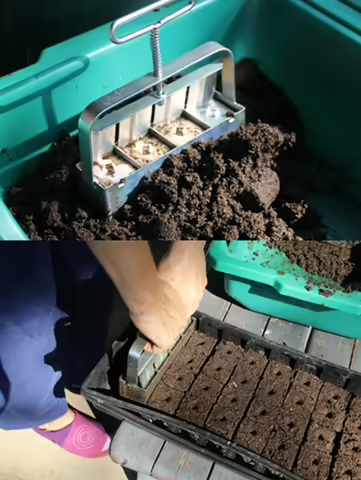
As seen in the picture above, I sometimes reuse plastic containers I have on hand to grow transplants, but more often than not I use soil blocks for larger seeding projects rather than buying new plug trays. A soil block is exactly what the name implies, soil that has been compressed into a cube using an ejection mold and used as both the container and growing media for starting seeds. Because there is no plastic enclosing the soil, roots naturally air-prune, creating a more fibrous root system. I learned about soil blocking through reading Eliot Coleman’s "The New Organic Grower."
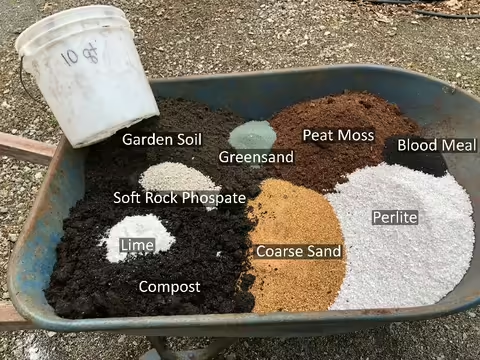
I have occasionally substituted items in the basic recipe, but the one thing that the blocking mix requires is the partially decomposed plant fibers from the peat and compost to maintain the block’s structural strength, otherwise the block would fall apart when watered or handled. I tend to use organic fertilizers, but a slow-release fertilizer could be substituted, and though heavier, coarse sand can be substituted for perlite. When I make the mix, I make enough to fill a large 50-gallon trash can.
Soil blocker ejection mold options
I would recommend starting with a block ejection mold that makes four 2” x 2” x 2” soil blocks with a standard dibbled depression for holding the seed. You can purchase long dibbles to accommodate larger seed or cuttings. From there, you can continue to build on the system to fit your needs. For example, what if you don’t need that big of blocks taking up so much space early on? In this situation, you could purchase a smaller blocker that produces 20 mini blocks (¾” x ¾” x ¾”) to start seed.
Once the transplant needs more space, go back to your larger soil blocker, and replace the standard or long dibbles with larger square dibbles which happen to be the same size as the mini blocks. Your mini block transplant will fit perfectly in the square depression in the larger block now and have more room to grow. If the transplant needs even more space, move that block into the next size up!
To get started, check out this video of Eliot Coleman demonstrating soil blocking.


