Plus, hear about upcoming rain garden educational programs and community installation projects happening across Illinois Extension.
Watch us on YouTube: https://youtu.be/k3_SuHDWQ18
Skip to what you want to know:
02:17 Topic of the day: Rain gardens. Why are they important?
06:02 Describing the urban stormwater system
10:05 Other stormwater management tools besides rain gardens
13:53 What is a rain garden? The difference between detention and retention
15:29 Where should and shouldn't rain gardens be in a home landscape?
16:13 Defining a rain garden: it's a depression in the ground! Yay, we said what it was finally!
25:17 Sizing your rain garden
36:42 Rain Garden installation tips
51:34 Planting design for a rain garden
58:34 Illinois Groundwork link
1:01:48 Rain garden maintenance
1:02:35 Mosquitoes and rain gardens
1:04:54 Thank yous and coming up next week!
Register for our Rainscaping Classes /events/2026-09-21-rainscaping
Illinois Ground Work Plant Finder Tool https://illinoisgroundwork.org/resources/plant-finder/
Contact us!
Chris Enroth: cenroth@illinois.edu
Ken Johnson: kjohnso@illinois.edu
Emily Swihart: eswihart@illinois.edu
Check out the Good Growing Blog: https://go.illinois.edu/goodgrowing
Subscribe to the weekly Good Growing email: https://go.illinois.edu/goodgrowingsubscribe
Any products or companies mentioned during the podcast are in no way a promotion or endorsement of these products or companies.
Barnyard Bash: freesfx.co.uk
--
You can find us on most podcast platforms.
iTunes - https://podcasts.apple.com/us/podcast/good-growing/id1446630377
Tunein - https://tunein.com/podcasts/Gardening/Good-Growing-p1187964/
Spotify - https://open.spotify.com/show/202u3siWExE1tTqrVgtmCR
Vurbl - https://vurbl.com/station/good-growing-4pljnNlUtyG/
Listen notes - https://www.listennotes.com/podcasts/good-growing-chris-enroth-cHLPMWpvEOG/
Ivy - https://ivy.fm/podcast/good-growing-167902
Castbox - https://castbox.fm/channel/Good-Growing-id4302614?country=us
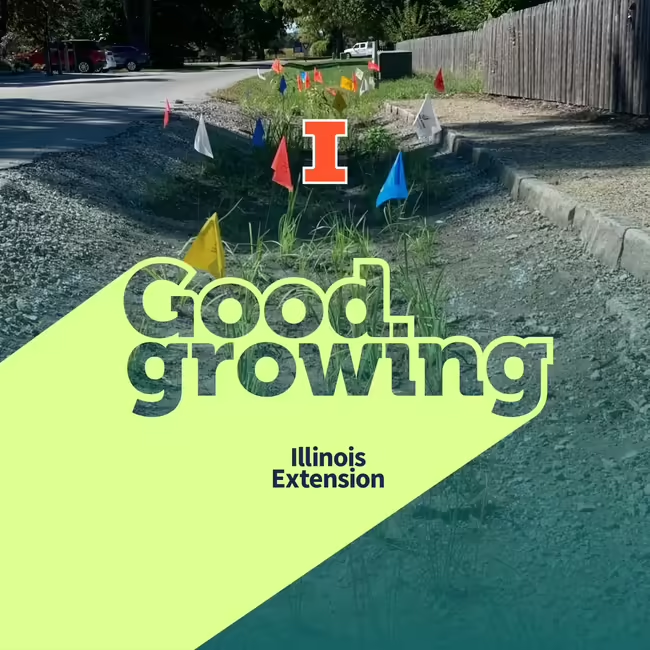
Welcome to the Good Growing podcast. I am Chris Enroth, horticulture Educator with the University of Illinois Extension coming at you from Macomb , Illinois, and we have got a great show for you today. Is it raining outside? Well, no. It has been raining for a while actually, or at least where I'm at, which might be a good thing to install the thing that we're talking about today, which is rain gardens.
Chris: 00:26We are gonna dive into this topic, but you know I'm not doing this by myself. I'm joined as always every single week by horticulture educator Ken Johnson in Jacksonville. Hey, Ken.
Ken: 00:35Hello, Chris. It's it's been a little dry here in Jacksonville too as of late.
Chris: 00:40I hear you're building bridges over your cracks, Ken. That's what you told me.
Ken: 00:45I have to go to the hardware store here soon and get some lumber.
Chris: 00:48Very good. We are also as always joined by horticulture educator Emily Swihart in Milan, Illinois. Emily, how's it going?
Emily: 00:57It's going well. We are also dry up here in the North. It is time for some rain. Although it's cloudy, so I'm keeping my fingers crossed.
Chris: 01:06Mhmm. Mhmm. Well, thing, I I just dropped my kid off at a summer camp in Southern Illinois, and they have a lot of tulip poplars there. And I think as you two know, when it's dry and hot, tulip poplars drop a lot of leaves. But this is an interesting tidbit.
Chris: 01:25They call it the teepee tree, not for tulip poplar, but I bet you can guess why. For campers, It works pretty good, in a certain, teepee, activity. So yes.
Emily: 01:41Than poison ivy.
Chris: 01:43Yep. That's that was also plentiful around there. So but yeah. No. It was common knowledge that they call it the teepee tree at that particular camp.
Chris: 01:51I said tulip poplar, and they said, no. What's that?
Emily: 01:56Anyway,
Chris: 02:00that's we're getting off topic here.
Emily: 02:02I think your kid's gonna learn a lot of valuable stuff at this camp.
Chris: 02:05I think so. Yeah. We'll have to correct some of the plant ID stuff, but, yeah, it might help in learning it.
Ken: 02:12Yeah.
Chris: 02:13Mhmm. Well, today, guys, we're talking rain gardens. And so I guess first, Emily, why? Why should we even care about rain gardens? Is there a reason?
Emily: 02:27Yeah. Well, it's one of the tools that we have available to us for managing stormwater. Right? We've got some changes in our climactic patterns where we are having more intense rainfall events. We are having rainfall events at different times of the year as compared to historically.
Emily: 02:46And so that, in combination with having just more built environment, the rainwater that we are getting is needing to be managed. So I guess, like, rain gardens are one option that we could consider. And we'll talk about the criteria. I do want to kind of just set that up at the front of the podcast, in that this is not a one size fits all application. It is something to consider, and there's some criteria that will help you evaluate if a rain garden is going to be suitable for your landscape.
Emily: 03:16But we need spaces to divert stormwater from primarily impervious surfaces, so things like rooftops and paved roadways or driveways. Sometimes it can be areas that have more permeable surfaces, but maybe not high infiltration rates. Like, they're still generating some some runoff. So think of, like, our turf grass areas. The infiltration rate on those spaces is not as much as it could be if it was used in in another way.
Emily: 03:48And so I think, you know, that to me is, like, is why. It's an available option. They're also really could be lovely, like, in addition to our landscape. And so I'm always kind of thinking of, like, how do we make things beautiful also, function and form? They can be beautiful.
Emily: 04:05So if you're trying to add beauty to your landscape and you have excess storm water you want to manage or you want to hold on-site, ring derns might be an option. There's other reasons I'm thinking of keeping our waterways clean. That would be more of an altruistic reason to have a rain garden on your landscape, helping to manage stormwater from a community standpoint. So when we collectively have all of our stormwater or most of our stormwater running off of our sites into storm sewer systems and then daylighting into stream corridors or river corridors that kind of like that filtering effect, or funneling effect, I guess, kicking all that stormwater and kind of pushing it towards a smaller space can result in flooding, can result in an influx of pollutants being transported into, you know, bodies of water where we would maybe like to keep them clean. I told you guys, I was just on a fishing trip last week and was reminded.
Emily: 05:09We were trout fishing, and they are particularly sensitive to changes in water temperature as well as pollutants. And so that was, like, to me personally, like a nice little precursor to this podcast, which was a reason to keep our streams and and our waterways clean by implementing some of these systems to help preserve aquatic life, which is is useful for a lot of reasons. We were recreating, but, you know, we want clean water in our communities, and so this is one way to do it. Because did I miss something? I'm trying to I wanna elaborate on the pollutants, Chris.
Emily: 05:49I I know you're particularly interested in that, and I think that's a really important point to hit. But why else would we do a rain garden? And, also, we should define what they are. Yes. Because I just started talking.
Chris: 06:03Well, I think another reason is that there are some some cities now require them or require if there's a new construction project, anything newly developed, they require so much storm water to remain on-site. Some percentage of whatever rain or snow falls on that property has to stay on that property because they know that they just don't have the infrastructure to handle if everybody just started putting homes or driveways or parking lots, whatever, on covering up all the landscape, they know their infrastructure just can't hold it. And so probably the more cost, know, the better thing in terms of cost would be to encourage folks or I guess require folks to handle some of that storm water on-site. That way they don't overload the system. It's cheaper at least than digging up the entire storm water system in an entire community and and replacing it.
Emily: 07:03Yeah. Can can we just, like, expand on that? Because I'm not sure everybody fully understands what happens with our storm sewers, like, underground. Right? They're kind of out of sight, out of mind.
Emily: 07:12And if you're not I was I was actually explaining some of this to my kids, and then it got it started occurring to me that I don't know that everybody fully appreciates, like, where the water goes, you know, and and what that storm source looks like. So, you know, there's, like, pipes underground, but they are sized. They are engineered at the time of install for a certain lifespan. What we've seen happen in a lot of our communities is that communities have grown beyond what they have been engineered for and or they are deteriorating systems, and they are pricey to replace. But so water that runs off of our landscape most often runs into a curb and gutter street system.
Emily: 07:53So you've got curbs and gutters along the sides. You've got that kind of a profile. There's an urban profile where like storm water just runs off kind of, like, into a ditch area. But in our communities, it runs into, you know, a street, and then that gets channeled down into a gutter, and there's a a drain inlet. And sometimes you'll see stickers on there that say, you know, keep it clean, and it goes beyond you know, a lot of times, we don't think beyond that, but that water that goes in there, and the reason we wanna try to keep it clean is because that water all then is channelized down to somewhere where it's daylighting.
Emily: 08:28It can be a pond, can be a creek, it can be a river, It could be a treatment plant, but oftentimes it's not. Also, in older portions of our communities, this is combined with the sanitary sewers. Like, these all they kind of they eventually meet together. Yeah, Chris, you know where this is going.
Chris: 08:49Yep. Mhmm.
Emily: 08:49Do you want to? Do you want to share what happens when we have so much rainfall?
Chris: 08:54So they have these when you have so much rainfall, there are some sanitary sewer systems that where they're combined, they actually will treat what they can, but once they get so much volume of water, just have to release it. Storm water, sewage, altogether into whatever water body, surface water body, stream, river, lake, whatever it is, they have to release it or else the system just gets overloaded. And we don't want our storm sewer systems backing up with our sanitary sewers because, well, that's just gross. We don't wanna be waiting walking down the sidewalk in a rainstorm, waiting through sewage, that's also overflowing there. So they just have to get rid of that water as fast as possible, which causes problems downstream and in stream, all water quality issues and and health and safety issues.
Chris: 09:48And so, yeah, it it's a it's a big problem. We have to spend a lot of money to disentangle that storm water system with that sanitary sewer system, and it it it's a big problem in in a lot of communities.
Emily: 10:05Before we get into rain gardens specifically, I had mentioned that these are this is one tool that is available to us. Can we just, like, bullet point just a few of the other options so that if people decide that this isn't for their space or, you know, they're just kinda curious about researching some other other options for managing stormwater, this is kind of a jumping off point. This is what you might type into a search. Super tension. So I'll I'll kick it off.
Emily: 10:31The urban forest. Trees are, in my experience, rarely talked about as green infrastructure or stormwater infrastructure as much as I would like to see them, and I'm sure that's a surprise to nobody. But they can handle massive amounts of water. And so just considering having trees in the in the landscape, And there are tools that can help you calculate. Anyone can shoot me an email if they want a link to some of those calculating tools.
Emily: 11:01But trees. Trees is a really great option for having something living in your landscape that can help manage storm water. Other ones?
Ken: 11:14Do a rain barrel. Like, some water for you. We've met a whole lot, but better than nothing.
Chris: 11:22We have the old fashioned cistern kind of mentality, at least in the Midwest. I mean, I know there's a lot of old homes that had cisterns. Like, it's kind of like a oversized rain barrel, and they would rely on that water for a lot of things. But we don't do that anymore. We don't often recommend that, at least for drinking and irrigating some edible crops.
Chris: 11:43Yeah. It depends, though.
Emily: 11:46I'll I'll go ahead, Chris. No. No. Go ahead, Emily.
Ken: 11:50You go.
Chris: 11:50I was switching to a different one.
Emily: 11:52Oh, I was too. So what's yours? Oh.
Chris: 11:55Well, lawn. I know people don't like lawn as much. They don't think of it as a stormwater tool, but lawn can absorb rainfall. It's when we divert our gutters and the runoff from our impervious surfaces onto the lawn, well, now it's overwhelmed, and then we start getting runoff on the lawn. But that's also part of that sponge that helps to absorb some of that rainfall, but it can it can easily be overwhelmed by other impervious surfaces draining onto it.
Emily: 12:27That's not what I was gonna say.
Chris: 12:29Okay. I I figured. I knew that. Yeah.
Emily: 12:32I'm glad you went. I was going to say, and it's similar to rain gardens, but bioswale would be an option. So this is like I said, it's similar to a rain garden where it's a planted kinda space, can be designed, but it's actually moving water through the landscape in a channel. So, like, at the largest scale, think of a roadside ditch as a bioswale, kind of transporting water. You can also do them kind of between houses, in areas that have, like, a valley kind of in the landscape.
Emily: 13:03You can create one or you could just kind of play off of what your topography already been a you know, is primed for. But what else?
Ken: 13:15Remove impervious structures, stuff. Mhmm. Get rid of your driveway.
Chris: 13:23It's a good one. Yeah. If if allowable. Sometimes the city doesn't get happy with you about that.
Ken: 13:30Or permeable pavers instead of Mhmm. Concrete asphalt.
Chris: 13:35Yeah. Those are good
Emily: 13:38shop gardens would be one. Yeah. Often, you know, need some structural engineering, a little bit more elaborate to install, but a lot of new buildings, a lot of urban buildings are having them included in the design. So
Chris: 13:52I know there are a lot of and and maybe we should start getting into what a rain garden is. But Yeah. Right now, I'm gonna make a distinction between two things, between a pond maybe and what a rain garden would be. So if you see, like a large commercial project, a big box store gets built. Well, very often they do have requirements like they're putting a big old parking lot on there, a giant building, all of that rainwater that used to be absorbed by the soil is now running off.
Chris: 14:21Very often those scales of projects require handling stormwater on-site. And so you'll often see what we call retention ponds being incorporated into a part of that site development. And I just know a lot of the the big box stores in my neck of the woods, they have these little ponds behind the buildings that are hidden. Canadian geese love it back there. But that is a retention pond.
Chris: 14:48You're retaining that water. Rain gardens are not that's not the goal. It is a detention system. And I like to say, you know, if if you get in trouble at school, the principal doesn't wanna retain you. They don't wanna hold you there indefinitely.
Chris: 15:07They just wanna detain you. They just wanna hold you there temporarily. So that's detention. So you're you're just temporarily holding that water, slowing it down so that it can infiltrate, and then releasing whatever overflow or extra back into that storm water system. But we're we're not wanting to create like a water garden or a pond, so to speak.
Emily: 15:29Should we move on to kinda where? Like, you know, like, what are some of the specifications? Like, I think we've maybe, I'm hoping, sold some folks on just entertaining the idea of a rain garden, maybe.
Chris: 15:42I think so. Yeah. Let's do that.
Emily: 15:45Like, how do we know if it's an appropriate stormwater management system for our our landscape? Like, what are the criteria? Like, where do we put them? Like, all of the like, all of these these kind of questions. Like, what where should it be and then where shouldn't it be?
Emily: 16:01Because there's a there's a list of shouldn'ts also.
Chris: 16:04Yes. Well, I I'd say the thing most people say to me is, like, I have an area that holds water. I'm gonna turn it into a rain garden. Now a rain garden, what we're doing here is we're basically just making a little depression in the ground. And if you already have a drainage issue, making that into a an even greater depression, little hole, like, little, bowl in the ground, that's not solving the problem.
Chris: 16:30So I my advice to folks is usually, if that's where the problem is, we need to go higher up in the watershed to maybe solve or relieve some of the issues happening in that spot. So where water pools is not necessarily where we wanna be putting a rain guard. We wanna be going higher up in that drainage pattern.
Emily: 16:51Yeah. When water is pooling, what it is telling us is that the infiltration is not happening. Like, the the water is not going into the soil, and that is one of the criteria for evaluating if a site is appropriate for a rain guard is because we don't don't wanna just retain the water. We want to have it absorb into the soil for many reasons. So it's not like we're not like like, we're not sending the water off the site, and we're not just holding it on the site.
Emily: 17:19We're trying to have it infiltrate. If there's an area of ponding, clearly, that's not the soil is not capable of doing that. So I agree. Putting it up up up higher in the watershed is a really good first step in evaluating. Additionally, like, are some spaces.
Emily: 17:39So, you know, if you have, you know, a site that has adequate percolation, you know, like infiltration so the water can go into the soil, there's still, like, landscape features that we want to avoid for, like, safety and for long term success. Some of those would include, like, our utilities. There's a lot buried under the surface, and so we want to avoid both, like, just putting a lot of water on top of those the utilities, but then also, like, they might need maintenance at some point, and so then when they need maintenance, they're gonna need to be dug up. So I'm talking about, like, utility or, you know, power lines. You know, a lot of our you know, some of our power lines are buried now, fiber optics.
Emily: 18:25We don't wanna put them over, like, septic tanks or well water supply sites, you know, in more rural landscapes, like in the country.
Ken: 18:34Well, with your utilities too when you're digging, you don't want to hit those.
Emily: 18:39Yes. How do we know where they're at?
Chris: 18:42Who do we call?
Emily: 18:43Who? Who? It's Ghostbusters? That's who we call.
Ken: 18:46Call Julie. 811.
Chris: 18:48Yes.
Emily: 18:50Yep. And that in Illinois so I'm kind of our I am a resident Iowan, but they I'm so thankful to be in Illinois regularly. That 811 is a national number. So if you're listening to this, we have listeners, you know, around the country, or if you have family and friends around the country, 811 is the national number to call. We call it in Illinois.
Emily: 19:13We call it Call Julie. In Iowa, they call it Iowa One Call. It might have a different name in different states, but the the number is the same. 811 is the same. And what you do is you file a a ticket forty eight hours in advance at minimum of where you wanna dig.
Emily: 19:28It notifies utility companies, and they will come out. You should have your site marked, they will come out and identify if there are known utilities at the site. And if you can work around them or if you need to relocate your your dig, do this for tree plantings too. But right now, we're talking about rain gardens. But anytime you're digging a foundation, a garden, you know, planting anything, go ahead and call.
Emily: 19:55It's a free service. There's our So
Ken: 19:58you can do it online too. So the we just did this for our yard. So it's illinois1call.com. You can can fill it out. You don't even have to talk to people if you don't want to.
Ken: 20:08You can do it all online. Tell them which where in the yard you want marked your address. Usually, a lot of times they'll ask for nearest intersection. But then they'll come out and then you'll get an email when somebody's come out saying, we didn't find anything or they'll leave flags and spray paint in your yard. Where stuff is that?
Chris: 20:30Yeah. I just filled one out. We're doing a rain garden with the city of Macomb, and I just filled out the online form. And I don't know if this is a standard practice. I just like to mark the digging area with white flagging.
Chris: 20:45Because very often, lot of the utility flags are not like white, the color white. There are other like, you know, orange, blue, yellow. That might be different depending on your location, but it seems to work well for me. I always just specify in that online form. Digging area is either kind of outlined in white flags or that if it's a tree, like there's a white flag in the spot where we're going to be digging, that seems to be a good way to to to guide whoever's doing that utility mark.
Emily: 21:19I'll also use spray paint to like outline the area or put like an x because sometimes flags move. So That's true. Just wanna make sure that we're doing our part to to maximize the outcome. Where else should we not put rain gardens? What about by buildings?
Emily: 21:40Yeah.
Chris: 21:42For most foundations, we wanna be at least 10 feet away. I often suggest, you know, if you have an older foundation, like an old block type foundation, maybe you have a dirt floor in your basement, 20 feet might be a better distance. And then retaining walls. If you wanna put a rain garden behind the retaining wall, when water goes into the soil, it actually puts pressure on the soil particles and pushes them apart. And a retaining wall, if it's not designed to handle that extra water behind it, it could fail faster than just with normal time.
Chris: 22:22So, be care I I I would discourage people from putting a rain guard behind a retaining wall that's not engineered correctly.
Emily: 22:31Yeah. Yep. Whether it's structural or decorative, doesn't matter.
Ken: 22:36Yeah. So I found something else too that 25 feet away from septic system drain field. Yes. Yes.
Emily: 22:47Kind of the same issue as the sewer.
Ken: 22:49Extra swampy out there.
Chris: 22:51Yes. Yep.
Emily: 22:53Yep. I had one more. Would be like the the buffer strips or the boulevard spaces. Sometimes in our communities, we think, like, the water is already going there. Our our landscapes are sloped towards the street.
Emily: 23:03We'll just intercept that water by planting in those boulevard areas. And sometimes they're not owned by us, so it's a you know, you'd have to get permission and a permit from the community. But more than that, a lot of times utilities are buried there. A lot times there'll be established trees, and we wanna try to avoid disturbing root systems as much as possible. And so we would prioritize maintaining those trees.
Emily: 23:28And then also, a lot of those a lot of communities have ordinances that require shorter plants being maintained in those spaces. And sometimes, the plants we're choosing to use in our rain gardens are going to be larger growing. And they might actually be happier too since we're channeling water towards them also. Right? So, like, so some of the chemicals that would be fed in there might include fertilizer.
Emily: 23:52So even if plants are smaller in size, they might be very, very happy if you're ring guarding and grow larger. So those boulevards it may cause some problems for visibility. So
Chris: 24:08You could grow some monster plants with all the extra fertilizer and water you're channeling into there.
Ken: 24:14And I think one other thing to think about is you wanna put it where you're gonna be able to intercept the water. So don't put it like back in the back 40 where you have no impervious or no drainage like no water is draining in that area because it kind of defeats the point of putting it in. Put it near where relatively near the house or wherever your impervious structure surface is so that the water is draining in that direction already. So you're not having to redirect it or just sit there and get no water.
Chris: 24:45Yeah. You have a concentrated flow of water coming out of a gutter downspout. Like that's, you know, it's a directed flow of water. You can capture a lot of that more easily than if you're trying to capture water coming off of a hillside. That's that that can be done, but that's more of like a it it's a different tactic.
Chris: 25:09It's like terrace swailing and things that needs to be done. So it's a lot more earthwork that is involved.
Emily: 25:15Okay. Well, we've identified where we can put them. Now we wanna evaluate the site as to whether it's appropriate. You know, we we it's not over utilities. It's not in the boulevard.
Emily: 25:27It's downhill from where we're gonna be trying to capture the water from. How do we know if the soil is is appropriate for infiltration and how big it is? Like, how do we design the bed? Who wants to take this?
Ken: 25:44Infiltration test.
Emily: 25:46There you go. That's right. What is an infiltration test?
Ken: 25:48So you dig a hole. I've seen recommendations like coffee can with foot wide, two feet wide, and it's all over the place. But dig a hole, fill it with water. If it is a think a lot times you want to do this like in the spring ideally where the water is already moist. If you're doing it this time of year where it's nice and dry, dig a hole, fill it with water, let it drain, maybe fill it again since it's really dry.
Ken: 26:14But eventually get that surrounding soil moist, fill it with water and then kind of track over time like every hour go out and measure how far down that water is infiltrated into the ground, how much is drained out. And then you can use that to calculate your infiltration rate. So it could be like an inch an hour or something like that. I think you'd or you'd convert that to over a twenty four hour time period. Mhmm.
Chris: 26:40Yeah. And so as Ken described, this is not a I'm gonna do this over lunch kind of thing. This is a better set aside a day or at least where you can, like, as he said, set an alarm on your phone to come out and check every hour. That way you can test that that rate of drainage. How many inches per hour are draining out of that hole?
Chris: 27:03And I'd also suggest as you're digging, as you go down like a foot, maybe two foot deep, grab a handful of that soil, try to do the ball test where you like create a soil ball, see if it crumbles or see if it holds together, that kind of indicates how much clay content's in the soil. You can make a really long ribbon, two inches or more, as you squeeze in it with your thumb and index finger, and if you can make that two inch ribbon, that also indicates high clay content. So clay holds water more, doesn't drain as quickly. We want to kind of we we would like to see more of a crumbly soil. And if you have more of a clay soil, it might require amendments or possibly looking at a a different spot.
Chris: 27:48And and and I also wanna add while we're talking about this, a rain garden doesn't have to just be one spot. I've seen a lot of rain gardens where it's multiple smaller gardens that are sort of chained together to to handle some of that runoff coming off of a surface.
Emily: 28:03And we're and we're designing and sizing them so that they will capture that first inch of rainfall. And so as we get into that, like, keep that in mind, like, the whole, like, size of the garden. So you have your your infiltration rates. But that when we get to sizing it, like, we're not assuming you're going to capture, like, the largest storm event that we'll we could ever possibly have. And so, like,
Chris: 28:30we're trying seven inches here in Macomb this year. It was the largest rainfall that I've seen.
Emily: 28:38Yes. We're not designing for that. We're designing for trying to capture that first inch of rainfall, and that's kinda why you said that with the you know, over the twenty four hour period. Yeah. Capturing.
Emily: 28:51There'll be an outlet designed into the rain garden. We'll get to that. So you know your infiltration rate. How do you size it then, and how deep is it? So, like and and to to be clear, I guess we should just articulate too, like, this is more of a flat bottomed garden.
Emily: 29:09There's some sloped sides, but this isn't like a bowl shaped. We're trying to get water to enter the garden and kinda disperse over the the base of the garden so that then it can infiltrate across that space. You'll have some sloping sides, but but that's that's the design of it. This we're not doing a bowl. We're doing more of a pie pan shape, I guess, if we want to be hungry right before noon.
Chris: 29:34Yep. That's a good point. Maximize that surface area for infiltration.
Ken: 29:38It's like your depth would be whatever your infiltration is over twenty four hours. So if you infiltrate 12 inches, you can make it 12 inches deep.
Chris: 29:49You could, but That's should when I often also suggest people do double check city ordinances because there are certain depths of things that you can put in your yard. And when you go over certain depths, well, now you're looking at like a pool or and that's not every community, but just double check because I have heard of that happening. Someone put in a a deeper rain garden, and it was, like, 18 inches. And then suddenly, the city's like, oh, you just put in a pool, technically. Like so I was like, okay.
Chris: 30:21Yeah. Check those ordinances because then they had to fence around it.
Emily: 30:24And that is also, like, you know, like a safety the 18 inches doesn't really pull to me, but that's a safety aspect. Between four and eight inches, I've sometimes seen 12, but between four and eight inches is what's recommended. Because also consider that there might be foot traffic through here. Like, that's a pretty big drop in elevation. So I try to have them blend into a landscape so it doesn't look like there's, like, a drop off or a hole in your landscape.
Emily: 30:53And and when the plants fill in, you won't likely notice a four to eight inch depression. 18 inches, you would certainly notice. The plants would be just peeking out of that, or you'd have to get some of those giant giant plants to fill in there. But you want it to kinda blend into the landscape as well, and so kinda from a safety standpoint and an aesthetic, kinda that that four to six or excuse me, four to eight inch Yeah. Depth is kinda what what you wanna be working with.
Emily: 31:24So if you do need to capture more storm water, so we're like, I was explaining, you know, to someone the other day, used a water bottle, it was like, well, like, the deeper, you know, the the deeper the rain garden, the more narrow it can be. But if you would, like, squish it down and have it more shallow, you could just spread out the area. And so, like, you're capturing the same amount. The volume is the same. But if you were going to need to have a shallower rain garden or just want a shallower rain garden but still capture the same amount, you just increase the area over which the garden is covering so the volume remains the same.
Emily: 32:04But we're missing a very key component in this equation, which is where's the water coming from and how much water is coming to that space. So you do need to know where, like, like, where you're capturing the the water from and what the area is of that space. So if you're capturing it from a roof, this is an easy calculation. You would just take the area of that that roof, you know, channels into a downspout, and the downspout maybe, like, you know, outlets into your rain garden. That's pretty easy calculation.
Emily: 32:41If it's overland flow, then there's a little bit more you know, look at some topography and and do some more observations as to what what area actually is feeding into your rain garden, but you still wanna find out the area of rainfall that's gonna be going into your rain garden. So and then you do math.
Chris: 33:01This is not a math podcast. This is a plant podcast.
Emily: 33:06It's not. And I always manage to confuse myself on this. I get it right, but I always have to, like, talk through it a couple of times. Chris or, again, if you're more confident, please go go ahead.
Chris: 33:18We'll let you run with this one,
Ken: 33:19Emily. Your your square footage divided by your depth gives you the square footage of what you're draining divided by the depth you made it is the square foot square footage of your garden that you're making. Yes.
Emily: 33:36Yep. So the roof area that you're draining from divided by the depth gets you the square feet of your garden.
Ken: 33:47And if you're if you're doing it from your roof, you need to calculate like if you're drawing from the gutters, just calculate where those gutters are draining from. Because you could have multiple gutters depending on the you know, the angle or the pitch and where you've got the different outlets and stuff. So you're not necessarily draining from the whole roof, from one gutter outlet. It'll take a little time to figure that out potentially. Use like a go to Google Maps, find your house.
Ken: 34:19You can kinda
Chris: 34:20And if you wanna check your answer, like, I think it's rule of thumb, most rain gardens are about a third of the size of the area they're draining. That's generally saying, like, checking your your math there.
Emily: 34:35Yep. And okay. For two thoughts. Ken, that was a very succinct description of the equation. And now I'm wondering, I think I always add in the calculation for the depth that it needs to be.
Emily: 34:48So I think that's where, like, I start getting more, like, numbers in my equation. But thank you for simplifying it because that's gonna be continually useful for me from now on. I spent years being confused by that. So that was great. And then gosh.
Emily: 35:06What was my other shoot. I was so excited to learn something and call it a day. Chris, what were you just saying? It was a
Chris: 35:14crazy disease. One third
Emily: 35:16Oh, yes. Size. Thank you. So that's the other thing that I like to keep in mind when when I'm designing these is that there is an outlet. So if you're using that rule of thumb and you undersize it, and you are capturing three quarters of inch, you know, of that rainfall versus the one inch, like, you're just capturing less storm water.
Emily: 35:39If you over size it, then you can capture more storms or storm water, you know, before it outlets out of your rain garden. And so I guess I wanted to bring that up because I don't want anyone to be stressing too much. You know, do the calculations. Do absolutely the best you can. You're gonna have more success, and you're going to achieve the goal of capturing storm water more completely if we do the calculations right.
Emily: 36:08There's also safety in knowing that, like, if we're undersizing it, there there can be an outlet, and the water will just run through the rain garden. So
Chris: 36:15Yeah. I think I think I've seen, like, four different ways to calculate rain garden size and depth. And, you know, in engineers, they're gonna be like, this is how many cubic feet of water this particular space is going to hold and and and infiltrate. Yeah. We don't need to necessarily get that into that much detail.
Chris: 36:34You definitely can, and a a quick Internet search will show you the multiple ways of calculating a rain garden size.
Emily: 36:42Install. Any tips for for installing the rain garden once you have sized it? And and I guess also, so we keep I've I said, you know, it might be pie shaped or, like, can have it be have some design to it. It can be kidney shaped. It can have you know, it can be s you know, it can fit into your landscape.
Emily: 37:03It can be a designed shape. It doesn't have to be perfectly round or, you know, rectilinear. It can be kind of as long as you have that flat bottom and water can can spread out over over the bottom, you can have it. And have some movement to the sides. Mhmm.
Emily: 37:22Alright. But install. What do we do? We just start digging? Get a backhoe?
Ken: 37:28Call Julie.
Chris: 37:31We'll call Julie again just to make sure nothing moved. Yeah. I guess you don't have to do it two two times in a week, but the the one thing that I like to incorporate with rain garden kind of design is people. We're putting these in in landscapes where we are. It's always nice to be able to incorporate maybe a way for someone to experience a rain garden without walking in it.
Chris: 38:01So maybe some type of a raised pathway. You could maybe build a bridge over it. I know the Red Oak Rain Garden has a bridge that goes over it on campus in Champaign. I've seen some where people put like really tall stepping stones where they can walk across a rain garden even when it's filled with water, the stepping stones are still above that water level that's been designed. And so but, yeah, I think that's a big one.
Chris: 38:26Incorporate ways for humans to interact with that rain garden because when we install it, we're going to be, you know, altering that soil. We don't want people walking on it all the time because that compresses the soil, that impacts the drainage and filtration rate. And so, yeah, we have to be mindful. We don't want people in it, but we do want people in it.
Emily: 38:49We want our cake and we wanna eat it too. Yeah. But, no, that's a really good point. That's, you know, if it's a public garden, so that's we're installing one here locally, kind of in a community garden. And so we were having a conversation about, like, who do we invite to install?
Emily: 39:04And, you know, it was like everybody. You know, the partners all are so excited about the opportunity to have this demonstration garden, you know, right in this community. We want to build excitement. We want to, you know, share education. I'll do some programming for it.
Emily: 39:20And I had to kind of pull them back and see, think we should be a little bit more selective about who and the quantities of people we're inviting to install because we wanna manage you know, not having a compacted rain garden afterwards where people are very excited to get in there and, like, walk around. We kinda wanna work lightly with the install and have the opportunity to interact with it afterwards. But excavation, so where you know, it depends on how deep you're gonna go. So I, you know, joked about getting a backhoe. That's probably not recommended.
Emily: 39:55A lot of times those can compact soils, can, you know, create kind of a pan layer in there, you know, but through scraping off the soil, just maybe overkill also. Fun fun to have, but not maybe necessary. So, you know, using a good old shovel and labor is how I've always done them. Now our next one is going to be quite large, and so I'm working with some partners. I didn't know, actually, Chris.
Emily: 40:27I didn't know. Maybe this is gets cut out. But I was thinking, like, a sod cutter to try to you know, we're not going very deep, but to just kinda kinda, like, shave off, you know, the sod from the site. We're trying to maintain some tree roots. It's not ideal of a location, but we're trying to keep it shallow.
Emily: 40:47So any thoughts for or advice? I'll turn
Chris: 40:51this Most definitely.
Emily: 40:52My own.
Chris: 40:54I think sod cutters are a great tool for you strip off that top layer of of turf grass. Sod cutters, you can also really help to control that boundary or that edge of where that garden is. They're they're smaller pieces of equipment, easier to maneuver for the most part. And you can set that depth for where that blade is. Now you can't go very deep, you know, a couple inches, but I really like using sod cutters, removing sod, use a flat bottom shovel then to kind of remove the soil.
Chris: 41:27You can then you could run over that space again, go into maybe the basin, set that blade as deep as it'll go and just go back and forth. Now be mindful, everywhere you step behind that sod cutter, you're recompressing that soil. So you gotta learn to walk to the side. You have your volunteers with the flat bottom shovels getting that soil, excavating it out as you're as you're going. So I guess it could be a pretty good tool.
Chris: 41:52Mini excavator maybe if it's a really large project or a a skid steer, also, to to excavate that soil out. We're trying to minimize compaction as much as possible. And if you do have a lot of clay, this is you're gonna excavate that out. And maybe compaction will be okay because you're gonna amend the soil with some type of, like, probably a heavy sand mix with a little bit of compost. And and so you will, I guess, be tilling that in a little bit to the top couple inches of that excavated soil.
Emily: 42:26Around the edge and then the inlet and the outlet when we're installing these. So I like to define the edge of these gardens. I like to put stones, like, kinda like larger stones around them, and that can be like a river stone, you know, a smooth kind of tumbled stone, or it can be, you know, like limestone, you know, a cut angular stone to define the edge because there's gonna be a drop. Personally, I like that. You can not have that.
Emily: 42:59You can actually just have it fade into the landscape, know, into a garden bed around it if you want. The garden I'm talking to is hoping to have, like, a soft landing style garden on the the current surface level and then kinda fade into the main garden And then kinda use this for for maximum education. It can be done either way. Do you guys have a preference? Do you have
Chris: 43:25I like I do like the hard edge of the edging stone. That's pretty neat. I I I would say that first day especially because you might not get this all done at once. But what if it rains at night? It would be a good idea to have that outlet set.
Chris: 43:44So you're excavating, set that outlet just in case it rains and you need an overflow. You don't you you have at least your basin shaped and you have an outlet for any of that rainfall to to get out of there, because water will choose the path of least resistance. And if you have a recently tilled, slope that might not be stable, it might find a way through that that soil and then erode away the the slope that you just created. So I I always like having that outlet established right off the bat.
Emily: 44:19And that can look like kind of different things. So it can just be it can be a pipe in the ground, and so then you would have it would be elevated above where you want. Like, it would be one inch, you know, elevation above the the basin of your green garden. So that when you hit one inch, any extra water would overflow. Depending on your design, it could be it would be below the top of your slope on the sides, but above your basin.
Emily: 44:45So somewhere in between that, you know, that rain garden, whatever you would like it to capture and what you've calculated it to capture. So that can be a pipe that then just kinda rejoins or outlet somewhere else or moves down to another rain garden. You know, if you've seen that, and, Chris, you mentioned that. It can be then also maybe like an overland. It could just, like, exit over top of the edge of your rain garden.
Emily: 45:10I've seen this done when, like, a rain garden is kinda put on a slope, a sloping site. And so, like, water might be be filtered into it from a building that is up on top of the slope, and then it is it is downslope from the building but on a hillside. And so then the water could just flow over land out of the rain garden. I don't love this as much. It's less controlled.
Emily: 45:35You can have some erosion, and that's when you really need to have that hard edge to help hold the rain garden in place. So is there another way? Any other ways?
Ken: 45:44I would say for the the rocks, think at a minimum, usually the recommendation is, yeah, at your outlet and your inlet because you're gonna have more water moving in those areas so you don't get erosion. Well,
Chris: 45:56we we did a rain guard project at a zoo and it was all overland flow coming into it and it was a lot. And we used buffalo grass as about a two to three foot edge into the basin. Buffalo grass, it's got stolons, rhizomes, and so it kinda knit together and create pretty nice little area for the water to hit that, slow down, and drop some sediment before it entered into the actual basin. Buffalo grass is not may may not be an ideal species for certain parts of Illinois, though. This particular zoo is actually out west in Kansas where buffalo grass grows very well.
Chris: 46:42We have a little bit different climate here in Illinois that is not as conducive for buffalo grass growth.
Emily: 46:49But that's your inlet. Let's talk about other, like, inlet options. So there's that one you mentioned, Chris. What about if we have a pipe for, like, piping it in from somewhere?
Chris: 46:59Yeah. You could bury it. You could do a buried pipe from gutters. That's kinda what I hope to do with the project that we have coming up. But we do have some utilities that are gonna be in the way of that.
Chris: 47:10So, yeah, what's the alternative? Yeah. I I talked with the the property owners about potentially calling like a dry creek bed or like a bioswale, trying to connect the downspouts to the rain garden. And so, yeah, we we might have to go above ground with some type of a swale. I'd love to be able to just pipe it directly into the rain garden, though.
Chris: 47:31It just makes it easier.
Ken: 47:34Pipe over the ground. Pick it up anytime though.
Chris: 47:37That. We talked about that. It's like, can we we can paint it green so it blends in, but I don't think that's a that's a no go.
Emily: 47:47You do need to make sure that and I think I believe this goes without saying, but I just wanna make sure we're covering our bases, which is that you need to make sure when you are laying that that pipe or or laying the the groundwork for your bioswale or your dry creek bed, whatever, like, the top of it there there there's actually a slope that where the water is then going to come from your the water source, and it's going to to gravity feed down to the rain garden. If it's all level, you're just gonna have ponding kind of in that area. So you wanna make sure that you are doing some just check your your topography or your your rise and run so that the water actually moves down into your rain garden. With a channel that you're you know, like a pipe that you're sending water through, do you put, like, a splash landing, splash pad at the at the outlet of that?
Chris: 48:44I would suggest it. Yeah. Yeah. We call these sediment traps usually. Because whether you're draining from a parking lot or a roof or whatever, you're gonna get sediment coming out of that inlet because the faster that water moves, the more sediment it can carry.
Chris: 49:03And if it's coming out of a pipe, well, it's moving pretty fast and it'll have a lot of sediment with it. So a lot of times it will be like a flat stone maybe angled ever so slightly up, you know, so that the water has to kind of travel uphill just a little bit. I mean, I'm talking like centimeters here of a lift. You could also put then stones then on the edge of that flat rock that again slows that water down so that velocity is not scouring the soil where it's coming out of right there too. So we wanna slow it down, it'll drop sediment, it'll reduce erosion.
Chris: 49:42So, yeah, I I always recommend some type of a sediment trap to slow that water down before it enters into that basin. One last construction thing that I had was after it's all been graded and it's it's all been created, but before planting is to put mulch on it. And especially for you, Emily, as you're having volunteers come in, you're gonna have a lot of foot traffic. The mulch just creates this nice little cushion where people aren't compressing that soil after it's been prepared. It's kind of a pain, though, to plant in mulch.
Chris: 50:20I just I don't like doing it, but it is probably the better practice in that regard so you're not tromping all over the the freshly prepared soil.
Emily: 50:29Yes. I agree. That's the plan. With mulch, a kind of a note on mulch is that it does float. Like, I I am a big fan of using it, and so it this goes to, like, the maintenance part of it.
Emily: 50:43So I like using mulch before we plant, you know, to kinda cushion the foot traffic. I also we plant smaller plugs usually is what I like to plant, and so they're they're much smaller plants. And it's hard to spread mulch after they're in. So it's kinda I mean, neither is extremely easy, but it's worth the the effort. And so, yeah, I'll do mulch first.
Emily: 51:07But if it rains, hopefully it rains, and we utilize our rain gardens, mulch can float. So if the plants are small, until they get established, you're going to want to plan to go out and kinda check and see if the mulch did float around, like redistribute itself in the rain garden. And if it smothered or piled up around some of your your small starter plants, remove it and save them. Put the mulch back where it belongs. So in a rain garden, I I'm going to just start off by saying it is a garden.
Emily: 51:40Right? So it is okay to consider the aesthetics of it. We want to make it beautiful. We want we put all this effort into calculating, you know, how much rain or rain water is gonna capture, taking extra care when we're constructing it, you know, kinda going to these extra lengths to make this garden. So when you're choosing your plants, pick things you like to look at.
Emily: 52:04You know, we want people to be engaged with the rain garden. That said, so there's there are kind of three zones of a rain garden that we often consider. So the basin is the the lowest area, and we've got our side slopes. Especially if you haven't put any stones or anything around them, you do have that side slope of the rain garden to maintain. And then you've got the the bank of it, so at the top of your rain garden.
Emily: 52:31Personally, I don't stress too much over what I'm planting where. Because of what I am planting in a rain garden, traditionally are going to be native plant species. They are going to be our more durable native plant species, the longer lived ones, is what I prefer to plant in there as well, because I don't want to have to keep going in and replacing plants. So unless they're going to reseed themselves or live for a long time, I I kind of evaluate out some of those shorter lived ones. I'm thinking of you, cardinal flower.
Emily: 53:05Like, you're stunning, but also you're short lived, and so sorry. You're probably not gonna make the cut for my rain garden, even though you do tolerate more moisture. But that said also, so if designed and installed properly, our rain gardens are not holding a lot of water. So we are not having to consider plants that can tolerate sustained periods of water inundation. Right?
Emily: 53:33Like, we're not planting a swamp. If you're doing a swamp, you did it wrong, and we should talk. So the idea is that these plants are going to be able to develop root systems that are going to help water infiltrate, can sustain some, you know, twenty four hours, no more than twenty four hours of flooding, you know, of of saturated soils. But then they also need to tolerate dry periods as well, because when we are going through something like we are right now in the Midwest, there are times where we're not getting any rainfall. So all of that said, I tend to favor just native plants and shorter growing native plants because this is a garden.
Emily: 54:20I guess I should also just say I'm not gonna actually just list a bunch of plant species. We have design tools on our website that you can go and get garden designs, and so we can link that. But that's, like, the evaluation criteria that I go by. I wanna, like, to look at it. It needs to be kinda long lived.
Emily: 54:36It needs to be able to develop this giant root system, which means I'm leaning on native plants. And can I just, like, go off on how, like, native plants have these, like, amazing root systems? Because I'm not sure that like, know them for their pollinator benefits, Ken, we love that. We love that they help support pollinators. And from a rain garden standpoint, they build soil structure.
Emily: 55:03They build soil. They can help, over a long term, actually create more water holding capacity, because these root systems on these plants may sometimes take up or be, I was reading, up to 70% of the biomass of a native plant. And so, like, aboveground, you're seeing name a native species, know, a large one, like big bluestem, right? Above ground, that's a sizable plant. It can get as tall as I am, five foot tall or more.
Emily: 55:41Below ground, it's going be 70%. Only only three tenths are above ground. It's just a massive amount of of root material that is below ground. And the way the roots develop in their perennials is they stay in the soil year round, so they're actively holding the soil. They're taking up space.
Emily: 56:01They're anchoring those plants in place, but they're also growing and contracting. Some fibrous roots will grow, and then they will die. And where they have grown, they are leaving pore space. So those are they'll deteriorate. That's organic matter that's going into the soil.
Emily: 56:17But once they have deteriorated into organic matter, those pore spaces that are left can hold water. And so they, over time, can build these channels where more water is going to be able to be infiltrated into our rain garden. And they go crazy far down into the soil. So not only are we creating a lot of spaces that water can infiltrate, like, at the surface level, they sometimes can reach up to 25 feet down into the ground, which is incredible. So then that water can move through the soil profile for much longer before it can, you know, enter an aquifer or it can move horizontally through the soil and daylight somewhere in the like, as a into a stream or whatnot.
Emily: 57:03So, anyways, really love them. There's some pictures and some resources. So the Tallgrass Prairie Center through the University of Northern Iowa has done some amazing growing trials. They've got some images, and you can get posters that show the extent of the root systems. It is wild when you can actually see it.
Emily: 57:29Like I just said, numbers, and again, not a math podcast. So when you see how extensive these root systems are, you can start to understand why they are holding, you know, soil in place or developing these really deep, dark, rich soil profiles that we benefit from in the Midwest. But how in a rain garden situation, once they're established, that can really help kinda maximize that infiltration. So thanks for letting me just do a little love note to native plants. And they help insects.
Emily: 58:10But they create wildlife habitat as well too, so, like, your songbirds and whatnot too. Like, above ground, again, we need to, like, look in at them. Do you have anything to add? I don't even I didn't even come up for air. So go ahead, guys.
Chris: 58:25What do you got, Ken?
Ken: 58:26So you mentioned websites. I'm doing a little research on this. It came around at illinoisgroundwork.org. So that's geared towards rain gardens. So it breaks plants out by what moisture requirements was it best for banks, slopes, basins, is it ground cover, is it seasonal interest, is it a structural plant, When it blooms, what color it is, if it's native, all that fun stuff.
Ken: 58:56So that'd be a good place. If people want to get ideas of what you can put where, check that out. We can put the link in the show notes.
Emily: 59:07I love that.
Chris: 59:09Well, I guess one other thing. So Emily, you're doing a rain guard project this year. It's a community project. I'm doing one. It's a community project.
Chris: 59:19And I've done a few others where, you know, they're in public spaces. And maybe I'll just touch on planting styles, like design styles. And so to differentiate, you know, we have our traditional planting style. I call this meatball landscaping, but but it's where you have a plant, and then there is a a little bit of mulch between each individual plants, and the plants don't touch each other, we shear them all into little meatballs. That's a traditional style, and it's where we typically see our foundation plantings.
Chris: 59:55And then we have our we have our what I've done as a rain garden actually a few years ago, block style planting. And this is where you just have these, like, blocks of mass plantings, and they're just sitting next to each other. This year for our rain garden, we're going to try matrix planting. So this is basically where you you in your basin, you have a ground cover, and we're gonna plant it on 18 inches centers, and this ground cover is gonna be adapted to that inundation temporarily and then between those, the kind of that grid of 18 inches in the middle, those squares, we're going to put like our structural plants and seasonal plants, so for some year round structure and then seasonal color, but we're always gonna have that matrix ground cover underneath. And so we're gonna plant communities of plants as opposed to blocks of plants or little isolated meatballs of plants.
Chris: 01:00:58So I look forward to trying out that. I've never done a matrix style design before, so we'll have our ground cover in the basin. It'll be a different species in the ground cover on the slopes and a different species in the ground cover on the banks. So and then again, we'll have those structural and seasonal plants then plugged in throughout that ground cover. And we're gonna minimize the amount of species.
Chris: 01:01:20I think our max is like five or six. We're just gonna make from a community maintenance standpoint, it's gonna make maintenance easier because you only need to train either your staff or your volunteers to identify like five different plants, and if it doesn't look like those five different plants, gets yanked. It's considered a weed. We'll we'll share more, I guess, after we're done planting this fall or maybe next spring with how that how it goes.
Emily: 01:01:47I before we wrap up, I just I wanna I think we failed to talk, like, about we've dabbled with maintenance. Mhmm. We've talked about the mulch, you know, floating. After we've installed our rain gardens, I think, Chris, you're making plans for it. I'm making plans for it.
Emily: 01:02:03If we don't have adequate rainfall after we've installed plants, you might have to water rain gardens just like any other garden in order to get those plants established. And so just wanted to make sure that that was articulated so that nobody you know, we're we're hoping for rain when it comes to our rain gardens, but we need to make sure our plants are established first. And then I have a question that comes up quite a bit with rain gardens, and I want to ask mister Johnson here about it because it's kind of up his alley, which is like, what about mosquitoes? Like, we're putting, like, we're cold and water on the landscape. I don't want mosquitoes.
Emily: 01:02:43That's the question I get.
Ken: 01:02:46Yeah, so that's where you're draining within twenty four or forty eight hours is going to be important. If it's sitting longer than that, then yeah, you have the chance of eggs hatching and larvae developing if if water is sitting there long term. But if it's draining within twenty four or forty eight hours, shouldn't be a problem. Because they're it's draining before they can hatch and complete that larval stage. Yep.
Emily: 01:03:10Because we do not wanna create more mosquito habitat.
Chris: 01:03:18They already like me, and I have plenty of them. So I don't need more.
Ken: 01:03:23Your bucket of doom.
Chris: 01:03:24Yep. So I guess, Emily, we've kind of teased this. We're we will be holding classes. Mine are gonna be, I believe, September twenty first through twenty fourth. We're we're gonna call it rainscaping, and I'll invite the public.
Chris: 01:03:42Can we invite the public to to yours? Or you have a closed class?
Emily: 01:03:48No. It will be open. We're still determining location and timing. So ours, it'll at the beginning of September, so those decisions need to be made very quickly. But if anybody is local, you know, or wants to travel to the Quad City area, keep checking our website.
Emily: 01:04:04We'll we'll post it there, and it'll be shared, our local HMRS. Henry Mercer Stark, Rock Island Counties. So when you go to Illinois Extension, we each have our own local websites. So that's where you would find local events. So
Chris: 01:04:23Yep. And I I think all the classes will be structured a little bit differently. So mine will be in Macomb. It's gonna be two days of classroom instruction and one day of rain garden installation with a rain date built in. Hopefully, we don't need it, but ironic that for rain garden, we need a rain date.
Chris: 01:04:42I think other locations include Cook County, Champaign County, and, Chris Leuking's unit, which is Bond and Clinton. Is that right?
Ken: 01:04:55So she is Bond, Clinton, Jefferson, Marion, Washington Counties. Yeah. Mount Vernon. I'm not sure which county it'll be in.
Chris: 01:05:04Well, that was a lot of great information on rain gardens and how you can put one in your own yard or come join our classes, if you're nearby or if, I guess, if you feel like traveling, and learn all about it, and we will install rain gardens in for our local communities. Well, the Good Growing podcast production of University of Illinois Extension edited this week by me, Chris Enroth. Emily, thanks so much for hanging out and chatting probably one of my top five favorite topics, is rain gardens. I do enjoy talking rain gardens.
Emily: 01:05:38Same. It's such a fascinating concept and useful tool to have available to gardeners, can be beautiful. So now I appreciate being back talking about Rain Gardens, and now we just need the rain.
Chris: 01:05:51That's right. Yes. And, Ken, thank you as always hanging out and letting us talking about Rainy Gardens this week. I hope it has made one of your top list of topics.
Ken: 01:06:05It's it's moving up there. I think I need to build one to fully appreciate that rain garden. Let So that to the never ending list of things to do.
Emily: 01:06:14That's right.
Ken: 01:06:15Let's do this again next week.
Chris: 01:06:18Oh, we shall do this again next week. You might hear us saying a lot, and I think we did this episode, rule of thumb. There seems to be a lot of rules of thumbs when it comes to gardening. So we're gonna dig some up and talk about them next week. Well, listeners, thanks for doing what you do best and that is listening or if you watched us on YouTube watching.
Chris: 01:06:40And as always, keep on growing.
Ken: 01:06:51University of Illinois Extension.
Chris: 01:06:57Yeah. Let's say if Monty Python and the Holy Grail taught us anything that that wood floats, ducks float, and witches float. So think that's the logic that was used. Yeah. Sorry.
Chris: 01:07:11We'll cut that part out.