How to care for a living Christmas tree
By Richard Hentschel, Illinois Extension Horticulture Educator
Those thinking green this holiday season may want to skip the tree lot and consider buying a living evergreen to plant outside after Christmas.
Buying the tree is the easiest part. Caring for it to ensure the tree lasts for years to come is a little more complicated.
Live evergreen trees can be purchased from nurseries either with the roots and soil balled and burlapped, also known as B&B, or in a container. B&B trees will be heavier and a little more awkward to handle than a container-grown tree which uses a light soil mix.
Unlike cut trees, living trees should remain outside until just before Christmas to keep it dormant. Find a shady location or store it on the north side of a building away from direct sunlight.
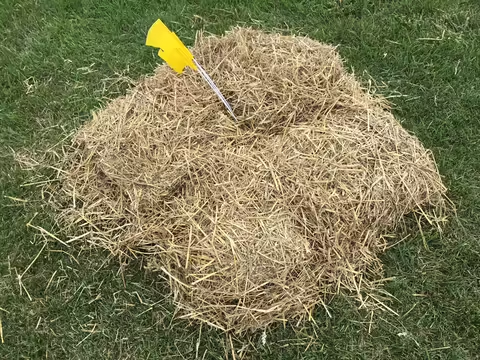
This is also a good time to pick a roomy spot for the tree’s permanent home. Evergreen branches will be at least 12 to 15 feet wide at the base and unless it’s smaller stature variety, trees can easily be at least 35 feet tall. Layer one or two bales of straw 6 to 8 inches deep over the site to keep the soil from freezing deeply.
Timing for moving the tree indoors and then planting it outdoors is critical.
Trees should only be inside for four to five days total. Otherwise, they may begin to break their winter dormancy and actually start to grow indoors.
Keeping the tree’s root ball or container moist before it is planted is important.
Container-grown trees have very efficient drainage and should be checked daily to make sure that the soil is moist. Place a large saucer underneath the container and water the tree evenly and just enough so a little water collects in the saucer.
B&B plants have heavier soil, which holds more moisture but needs more preparation. Use a large watertight container, such as a reusable plastic tub or large pot, filled with moist potting soil or shredded peat moss to support and insulate the root ball.
Once inside where the air is drier, check moisture levels daily.
If the living tree is shorter than a typical cut tree, consider elevating it on a stable structure, such as cement blocks. The tree is out of reach of pets and there is more room underneath for presents.
When the tree is ready to be planted, move the straw and dig a shallow hole that is at least 12 inches wider than the ball or container to give the roots room. Remove the burlap or container and any rope or twine. The root flare, where the base of the trunk starts to flare out, should be at ground level or slightly higher.
Water the newly planted tree well and use the straw to mulch it, which will slow the ground from freezing and allow the roots to acclimate.
When spring comes, plan on watering it regularly to supplement the rain as needed, especially during dry summer months.
Grow a living Christmas tree with Norfolk Island Pine
By Ken Johnson, Illinois Extension Horticulture Educator
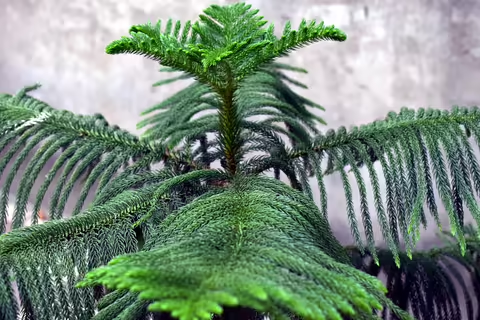
Miniature living evergreen trees, often decked out with bells and bows, are a common decoration or gift during the holidays. With proper care these Norfolk Island pine trees can last for years as beautiful houseplants.
Despite their name, these evergreens are not actually pine trees. Instead, they belong to the ancient plant family Araucariaceae, which were widespread during the Jurassic and Cretaceous periods but are now confined to the southern hemisphere.
In their native habitat on Norfolk Island, which is in the South Pacific, these evergreens can reach heights of up to 200 feet and have trunks up to 10 feet in diameter. European explorer James Cook arrived at the island in 1774. With the trees’ long, straight trunks, Cook believed the island’s evergreens could be used to make ship masts.
Ever since, Norfolk Island pines have been transported around the world. They can be found growing in humid coastal areas in many countries, including the U.S.
In addition to being used as an ornamental plant, their wood is used for construction, woodturning, and crafts.
As houseplants, Norfolk Island pines grow slowly, about 3 to 6 inches a year and they typically will reach heights of 6 to 8 feet, although they can grow taller.
The key to maintaining any healthy houseplant is to mimic its native environment as closely as possible.
Homes tend to be dry, especially in winter, so it is important to take steps to increase the humidity around plants. This can be done by misting plants, using a humidifier, or making a humid microclimate.
Fill a saucer with rocks and add water until the rocks are slightly above the water line; then place the plant on top of the rocks. While Norfolk Island pines like moist conditions, if the plant is overwatered or has wet feet it can lose branches. Allow the soil to dry between waterings and make sure the pot has drainage holes.
A diluted liquid houseplant fertilizer can be used every two weeks while they are actively growing, typically from March to September.
Norfolk Island pines enjoy bright locations, but they can tolerate lower light conditions once they have been acclimated. If plants are not allowed to acclimate, entire branches may yellow and die. In low light conditions, branches become long and droopy, and growth will slow. Turn the plant occasionally so it receives adequate light and grows evenly and straight.
With proper care, a holiday Norfolk Pine tree will last for years to come.
Picking the perfect Christmas tree starts at home
By Ron Wolford, Illinois Extension horticulture educator
From pre-lit artificial trees to potted living evergreens, the holidays have more tree options than ever, but for some only a visit to the tree lot or farm will do.
Visiting a Christmas tree farm, garden center, or pop-up lot and choosing a real tree is a family tradition for many. Keeping that tree fresh throughout the holiday season is a lot easier with some pre-visit planning.
The first step is to find the perfect spot. Pick a location away from heat sources, such as spaces heaters, fireplaces, TVs, radiators and air vents to avoid drying out the tree and creating a safety hazard.
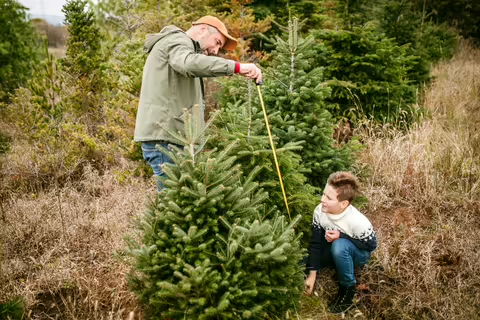
Next, measure the height and width of the space in the room where the tree will be placed. There is nothing worse than bringing a tree indoors only to find it's too tall. Take a tape measure with you to the farm or the tree lot.
If the tree will be displayed in front of a large window, choose one that looks as good as possible from all angles. If the tree is against a wall, a tree with three good sides is a great option, while a tree with two good sides would work well in a corner.
Keep in mind, the more picture-perfect a tree is, the more expensive it will be.
When choosing a tree, look for a healthy green specimen with few browning needles. The needles should be flexible and not fall off easily. Raise the tree a few inches off the ground and drop it on the trunk end. It is normal for a few inner brown needles to fall, but very few green needles should drop off the tree.
Make sure the trunk or base of the tree is straight and long enough so that it will fit easily into the stand after making additional trunk cuts. When buying a tree from a retail lot, Wolford recommends going during the day to get a better view.
If you’re not putting it up right away, store the tree in an unheated garage or some other area out of the wind. Make a fresh 1-inch cut on the end and place the tree in a bucket of warm water.
Before moving the tree indoors, check for any bird nests or insect egg masses. Cut another 1-inch slice off the stump and place the tree in a sturdy stand with water. Commercially prepared mixes, sugar, aspirin, or other water additives are not necessary. Research has shown that plain water will keep a tree fresh.
The stand’s water reservoir should provide one quart of water for every inch of trunk diameter. Keep the water level several inches above the cut. If the base dries out, resin will cover the cut preventing the tree from absorbing water.
After the holidays, consider rehoming the tree. Many communities offer a recycling program with trees going on to provide habitat for wildlife, enrichment for zoo animals or to create erosion barriers.
For more information about trees selection and care, visit go.illinois.edu/ChristmasTreeCare.
Perennial plant of the year Calamint a perfect pick for pollinators
By Martha Smith, University of Illinois Horticulture Educator
As constant as the New Year’s Eve ball drop in New York City, every year the Perennial Plant Association presents its plant of the year. Its 2021 choice is calamint, a sun-loving, low-growing bushy perennial with long-lasting blooms that benefit pollinators.
Since 1990, Perennial Plant Association members have voted for a standout perennial to showcase annually. These plants are always low maintenance with multiple-season interest and are suitable for a wide range of growing climates according to the association.
Calamint, Calamintha nepeta subsp. Nepeta, is a member of the mint family and is an excellent companion for an herb garden, does great in containers and is lovely cascading over low retaining walls
It is low maintenance, undemanding and dependable and is the perfect companion for other summer bloomers and foliage.
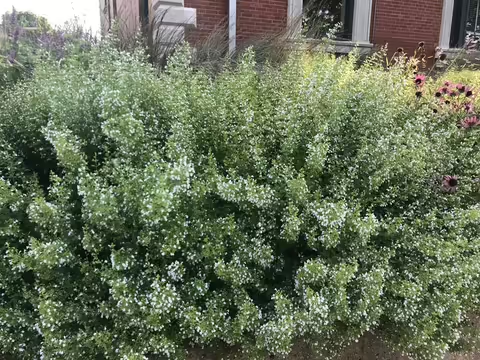
With tiny white flowers sometimes touched with pale blue from early summer until frost, calamint supports bees, butterflies and other pollinators while its aromatic foliage is deer resistant.
Native from southern Europe to Great Britain, calamint prefers full sun and will tolerate partial afternoon shade. It does best in soils with good drainage but once established it can be drought tolerant. Plants grow up to 2 feet tall and 2 feet wide and work well as an edge planting.
It is a favorite in stylized meadows, matrix plantings and other modern perennial designs. Gardeners can also create a lovely monochromatic garden with past plants of the year such as Anemone xhybrida ‘Honorine Jobert’ and Phlox paniculata ‘David’, or complemented with ornamental grasses such as switchgrass, Panicum virgatum ‘Northwind’, or little bluestem, Schyzacharium scoparium.
Gardeners may have noticed that the scientific name of calamint refers to a sub-species, subsp., instead of a plant variety, var. The difference is a matter of taxonomic semantics. The two terms are interchangeable according to the International Association for Plant Taxonomy. Much like the metric vs. imperial systems of measurement, European plant taxonomists use subspecies while North American taxonomists prefer variety.
Calamint is easily started from seed. It may spread in the garden by rhizomes or self-seeding to form an interesting ground cover. Stems touching the ground may root at the nodes.
Shear or cut back plants after flowering to tidy the planting, to remove unsightly foliage or to prevent any unwanted self-seeding.
To see calamint in its full glory, visit Lurie Garden in Chicago where it is planted in several areas.
Blooming plant ideas for Valentine’s Day
By Brittnay Haag, Horticulture Educator, Illinois Extension
The tradition of giving flowers to family and friends to express affection on Valentines’ Day began centuries ago. Give your loved one a gift this year with blooms that can be enjoyed long after February 14.
Blooming houseplants are great alternatives to traditional bouquets of cut flowers. With a little care and maintenance, these plants can thrive in your house or office and rebloom multiple times.
Kalanchoe
This waxy leafed succulent is low maintenance and has colorful blooms. Kalanchoe flowers can be red, pink, yellow or white. Cut off the blooms once they are faded to encourage new buds to form. The soil should dry out between watering, as this plant can be easily overwatered.
Kalanchoe grows best in bright, indirect sunlight and may get leggy in low light conditions. It can also be easily propagated by stem or leaf cuttings to create new plants. Place the plant outside in the summer to grow and bring them inside before the first frost. They will develop flower buds in response to the long nights of fall.
Cyclamen
These heart-shaped leaved plants have unique foliage and showstopper flowers that can bloom for four to six weeks. Flowers can be a variety of shades of red, pink and white. Water cyclamens at the base of the plant when it dries out, soaking the soil until water flows out the bottom drainage holes. Cyclamens grow best in bright, indirect sunlight and thrive in cooler temperatures, 55°F to 60°F.
Cyclamens will go dormant after they bloom with foliage yellowing and dying down to the soil. Remove the dried foliage and place the container in a cool, dark place for two months. After the dormancy period, resume watering and add cyclamen bulbs to a new container of soil and place it in bright, indirect light. New foliage should start growing soon with blooms following a couple of months after.
Miniature Rose
Instead of an arrangement of cut roses that will die after a week, give someone the whole plant. Delicate miniature rose buds can be found in red, pink, or white and can be deadheaded to encourage new blooms. When grown indoors, roses need bright sunlight in a south-facing window and constant temperatures ranging from 60°F to 75°F. Lightly mist the foliage daily to maintain humidity levels.
They can be planted outdoors in a container or the ground in the summer but bring them inside before the first frost. Most miniature roses will go dormant in the winter and begin to grow again in the spring.
Orchid
Many orchid species grow well indoors. Phalaenopsis are commonly found in stores and the easiest to care for. While orchids can be a challenge to rebloom, they will if placed in a window with bright, indirect light.
Orchids also need a good source of humidity. They do well in the kitchen, a bathroom or on a tray of gravel and water. Water orchids weekly with collected rainwater or distilled water until water flows out the drainage holes and fills the tray below. Allow it to dry out between watering. Mist the plant frequently to maintain the surrounding humidity levels.
Or, if you are looking for something a little more unique, give a potted Venus flytrap, sensitive plant, air plant, or succulent.
Visit Illinois Extension's website at extension.illinois.edu/global/horticulture for more information about houseplant care and maintenance.
How to create a fruit garden
By Bruce Black, Horticulture Educator, Illinois Extension
Winter is a time for togetherness and rest before spring. It’s also a great time to look ahead and make plans for new garden ventures.
A perennial fruit garden is a great project with years of benefits. Proper planning and set up can give home gardeners decades worth of fresh produce.
Begin by looking at the landscape and deciding if and how much space there is for new additions. Tree fruit such as apples, peaches, and cherries need more space than small fruits such as kiwifruit, strawberries, blackberries, and blueberries. Those with limited space can consider container fruits.
Next, consider the site. Fruit plantings prefer a full-sun fertile location. Planting in an elevated or sloped site helps with water drainage and air circulation. A windbreak helps tree fruits in the winter and keeping out of low laying areas helps to avoid frost pockets.
Make sure to pick a convenient location close to a water source. If it is out of sight, gardeners may not prioritize its maintenance or prefer not to walk to a distant site in the heat of the summer.
Doing a soil test provides a baseline of nutrients and pH and amendments can made as needed for fruit crop varieties.
Avoid areas that may have had Verticillium wilt, a soilborne fungus that can affect more than 300 plant species. Verticillium wilt reduces fruit yields, causes wilting, stunting and killing of plants. Plants may be infected for awhile before symptoms are visible. Try not to plant in areas planted with in the last three to five years with tomatoes, potatoes, peppers, melons, okra, beats or roses.
The final step of planning your fruit garden, is selecting plants. Cultivars should be adapted for USDA zone 5 or colder for Northern Illinois and zone 6 or colder for Southern Illinois. Look at local garden centers, nurseries, and national fruit stock retailers for cultivars and necessary cross-pollinator cultivars.
While researching and planning, feel free to contact the University of Illinois Extension office in your county with any questions. Master Gardener volunteers and Extension staff are happy to provide guidance and recommendations.
For more information on fruit garden planting, check out Illinois Extension’s Small Fruit Crops for the Backyard website at web.extension.illinois.edu/fruit/index.cfm for fruit specific information and cultivar recommendations.
Preventing fruit tree diseases starts in the dormant season
By Andrew Holsinger, Horticulture Educator, Illinois Extension
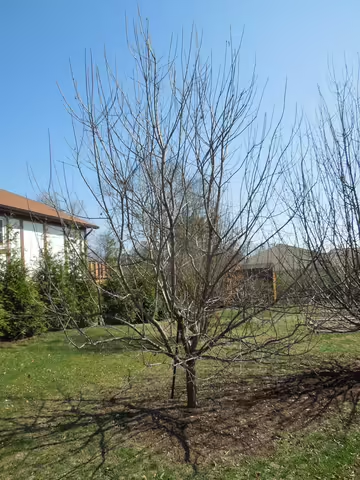
Winter is a great time for orchard owners and fruit tree gardeners to reflect on how their trees are doing and to create a plan for the coming growing season.
When it comes to disease possibilities, tracking seasonal successes and failures helps in the long term.
Keeping a journal of activities of management and care is essential in caring for fruit trees. Using a spray guide provides a reference based on the disease and physiological state of the tree.
The most effective way to care for tree fruit diseases is for both commercial and homeowner level gardeners to know when to spray fungicides and herbicides. Often, a tree is infected long before symptoms are observed and prevention is key to tree health, especially with fungal diseases. Fungicide needs to be applied and reapplied to keep trees protected throughout the season.
Some sprays can only be applied in late winter and early spring to prevent disease before the leaves have emerged. Diseases often develop because a spray wasn’t applied.
Peach leaf curl is an example of a disease that can easily be avoided by spraying during the dormant season.
Fruit tree disease prevent starts early by choosing disease resistant varieties. Only plant top quality, healthy nursery stock to avoid failure. Trees that are stressed are more susceptible to disease and insect pressures. Controlling insects and other pests is important because any wound on trees or fruit is a possible entry point for pathogens.
These apple varieties have disease resistant characteristics and are good options for Illinois landscapes or orchards: Crimson Crisp, Dayton, Enterprise, Freedom, Golden Delicious, Gold Rush, Jonafree, Liberty, Priscilla and William’s Pride.
Also consider dwarf or semi-dwarf trees which are smaller and more easily manageable when it comes to disease control and fruit production.
Good tree sanitation is also important in preventing disease. Inspect trees for mummies, which are unpicked, withered and infected fruits that carry spores that can cause problems during the next season. Cleaning up fallen leaves and fruits after the harvest is a good practice to reduce the number of fungal spores, especially for apple scab, for next year.
Pruning is probably the most neglected aspect of disease control. Pruning allows for more air circulation, light penetration and more adequate spray coverage.
Spray schedules guides from the University of Illinois are available for both commercial and home growers at go.illinois.edu/MFPM and go.illinois.edu/PMHL.
Winter pruning boosts blackberry and raspberry harvests
By Kelly Allsup, Horticulture Educator, Illinois Extension
As a child, my grandparents would send my sisters and I to the unmanaged portions of their property to pick blackberries. The plants were a gangly massive mess of thorns that produced a minimal amount of fruit. Most of the time we brought enough for grandma to make a pie with probably just as much of the sun sweetened fruits in our bellies.
Although, this was a tactic to get the grandkids out of the house, imagine if these wild berries had been pruned in late winter? We might have brought back enough for 10 pies.
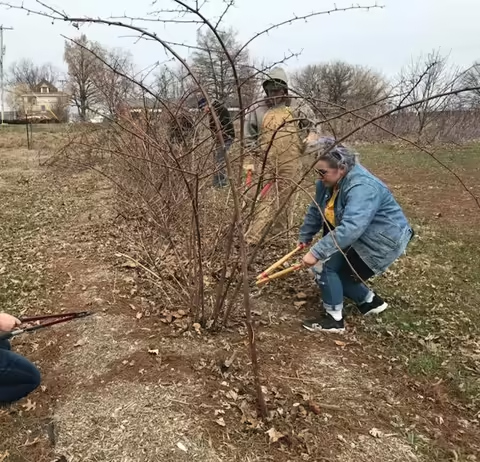
Pruning backyard brambles in late winter not only increases production of fruits but also aids in disease prevention throughout the growing season.
Bushes have different pruning needs depending on their attributes. Everbearing plants need to be trimmed in late winter erect brambles need pruning in summer as well. To make pruning less intimidating, gardeners should identify the cultivar to make a plant specific plan before bringing out the loppers.
Primocanes vs. Floricanes
Blackberry and raspberry bush canes, the bramble’s stems, are a mix of primocanes and floricanes. Primocanes are vibrant green new-growth canes. These canes are not ready to produce flowers or fruit, except for fall-bearing brambles.
Floricanes are older, overwintered canes that produce flowers and fruit and can be productive for up to 20 years. These dark red stems are covered in a white bloom, which rubs off and is used by the plant as a sunscreen.
Without pruning or cutting back canes, the bush produces less fruit and can harbor disease and pests. Old fruiting structures on the plant indicate that the cane is a floricane that should be removed.
For example, on a semi-erect blackberry ‘Chester Thornless’ remove floricanes, and diseased canes until there are only six to eight of the strongest primocanes. On these branches, cut back the tip of the stem to 5 feet. The primocanes will have lateral branches that should be pruned to 18 to 24 inches long.
If pruning a thorned variety, wear gloves and long sleeves.
Roots suckering vs. hills
Root Suckering: Brambles such as yellow raspberries, erect blackberries, and the red raspberry ‘Lauren’ spread by root suckers, creating a hedge row. They are thinned by cutting canes to the ground, leaving 6 inches between canes and removing any canes outside of the row.
Hills: Brambles such as black raspberries and semi-erect blackberries do not spread by suckers and retain their individual plant-form in a “hill.” For pruning, last year’s floricanes are removed and the primocanes are headed back.
Everbearing vs. Biennial canes
Most brambles produce on biennial canes, but some are everbearing, which means it can bear fruit until the fall. Brambles such as yellow raspberry ‘Anne’ are everbearing.
If the primocanes that bore fruit in fall are left to overwinter, they will fruit again, lower on the cane in late spring and then die. By mowing down all the canes in late winter, you sacrifice the first harvest to have a more abundant harvest in the fall.
Erect and Semi-erect
Erect brambles produce stiff, upright canes that need summer and winter pruning. The erect growth habit is common in both raspberries and blackberries. These tend to not need a trellising system.
Semi-erect brambles produce thick, arching canes that benefit from winter pruning. These varieties will start growing upright and bend over to trail along the ground if not supported. Growth habit determines the type of trellis support canes require. Black raspberries tend to be semi-erect and if not pruned adequately the tips of branches will touch the ground and begin to root, limiting fruit production. The Refuge Food Forest in Normal, Ill., where I live grows black raspberry ‘Bristol’ that must be tipped during the summer or the mowers will have issues between the rows.
Pruning at Spring Planting
New plants should also be pruned to the ground when they are planted in early spring. If looking for cultivar recommendations for Illinois, visit Small Fruit Crops for the Backyard.
Most plants purchased online will come bare rooted and should be soaked in water at least 30 minutes before planting. Plants from nurseries or greenhouses may come potted up and will not require soaking
Plant new brambles 4 to 6 feet apart in a hedgerow when the soil is not wet. Hedgerows should be 10 to 12 feet apart for Illinois semi-erect varieties.
Dig a hole one and a half times wider than the root system and fan out the roots. Water immediately and at least every two to three weeks after planting. After planting, apply shredded bark mulch up to 3 inches thick away from the base of the plant. Apply fertilizer a month after planting.
Small but mighty microgreens are easy to grow indoors
By Austin Little, Illinois Extension Horticulture Educator
With the winter upon us, gardeners may be looking for a new project to keep their green thumbs active.
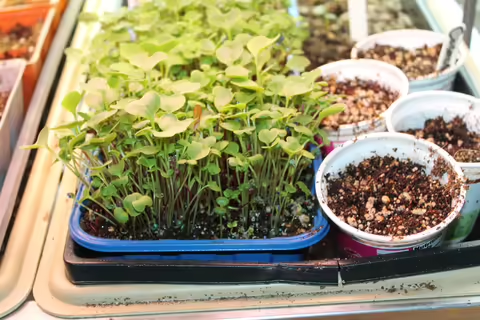
Growing microgreens indoors is a fun and relatively easy project to set up. It also rewards the grower with fresh tasty produce in a short time period.
Microgreens are the tender new shoots of vegetables plants which are harvested before they reach maturity.
The basic supplies to get started with microgreens are a shallow container with drainage such as a plastic tray or pie tin. Takeout containers can even work, just remember to poke some holes in the bottom for drainage. The rest of the supplies include vegetable seeds, growing medium, a light source and maybe a bit of plant food.
That’s really all you need to get a tray or two of microgreens started this winter. Although many enthusiastic hobbyists upgrade with some starting successful microgreen businesses in their homes.
Many vegetables can be grown for microgreens including mustard, kale, endive, arugula, beets, radish, watercress, peas, cabbage, basil and most kinds of lettuce. Plants in the Solanaceous or nightshade family which includes tomatoes, eggplant and peppers, should not be grown as microgreens due to toxins in the stems and foliage.
Once seeds have been selected, the next step is to add the growing medium. The easiest way to get started is with a store bought premade potting mix or soil mixed with compost added to the container about 2 inches deep.
Since the shoots are harvested while they are immature, seeds need to be planted densely, about ¼ of an inch apart or less. After broadcasting a layer of seed, spread an additional thin layer of medium over the top to cover the seed and press down lightly to secure the seeds.
Water the soil so it is moist but not sopping wet. Some growers pre-moisten the medium before planting and then water a bit more after. Microgreens generally don’t require much added fertility, but it may help to include a small amount of water-soluble fertilizer or root stimulator nutrient solution with the first watering. Rates for these fertilizers are low, around a teaspoon per gallon of water.
Check the container daily to make sure the medium stays moist. Spray the medium once or twice a day or bottom water the container. By placing the growing container in a tray with a shallow layer of water, it can slowly take up water over several days.
Microgreens need about six to eight hours of light per day for optimal growth. A sunny south facing window is preferred. Alternatively, LED grow lights can provide the needed light. Also keep temperature in mind. Microgreens grow best around 70°F but will tolerate down to 50°F although growing slower. A seed starting heat mat can be used if temperatures are low.
Microgreens are ready to harvest in about 10 to 12 weeks. Take up the whole plant with the roots or cut them at the base with sharp scissors. In both cases, they need to be submerged in cold water and rinsed thoroughly. The greens can be harvested all at once and stored in the fridge or harvested as needed.
Compared to their full-grown versions, microgreens offer unique flavors. After a quick wash, you can ask them to salad or a stir-fry and on top of soups and sandwiches for a fresh crunch.
For further instructions, Illinois Extension has a recorded webinar on growing microgreens available go.illinois.edu/MicroWebinar.
Keep houseplants happy with simple solutions
By Sarah Vogel, Illinois Extension horticulture educator
Keeping houseplants is a source of satisfaction for many. But when plants are not thriving it can be concerning and confusing.
As soon as a leaf yellows or develops a brown spot, many reach for fertilizer or household pesticides, neither of which is an appropriate first response.
Yellowing, brown edges, leaf spots or drops are all symptoms something is ailing a plant and cultural or environmental conditions are often the culprit. Knowing what to look for can alleviate houseplant woes.
All species of plants have specific light, water, and soil condition needs. This houseplant care guide from University of Missouri Extension and available at go.illinois.edu/CaringForHouseplants outlines the basics of each.
Many plants go through an adjustment period whenever they are moved. This can happen whether it’s from the nursery to a home, the living room to a porch, or one window to another.
This may cause yellowing or leaf drop but the plant will eventually acclimate if in favorable conditions. If the yellowing continues longer than a few weeks, place the plant in another spot and change its watering schedule slightly.
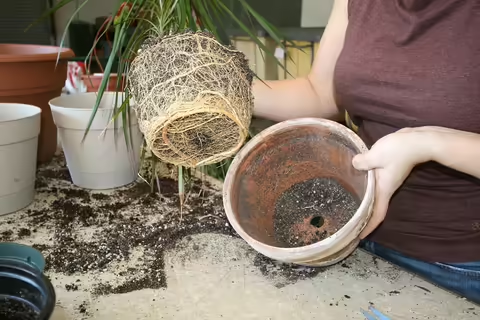
Yellow leaves can also mean the plant is overwatered. A great way to decipher watering issues is to carefully remove the plant from its container and look at the roots.
With some exceptions, healthy plants generally have white roots. If the roots are rusty orange to light brown it is underwatered, and if the roots are dark brown to black it is overwatered.
Gently place the plant back in the container and adjust the watering schedule accordingly. If overwatering is the issue, withhold water until the soil is quite dry and gradually begin a new watering schedule. After two weeks, apply a water-soluble, houseplant-specific fertilizer. If no improvement is seen in the next two weeks, repot in fresh soil.
Yellowing may also occur if a plant needs to be fertilized. Depending on what nutrient is needed, yellowing may begin on the outer edges of leaves, or from the vein outward, or the leaf may even curl. Become familiar with the fertilization needs of each species. Occasionally a plant needs fertilization when it becomes root-bound and may simply need to be repotted into a larger container.
Leaf spots on foliage can be caused by too much sun. When spots appear consistently, move the plant to a place it receives less sun.
Leggy or stretching plants occur when they are reaching for more light. Move them to a brighter location or turn them occasionally to keep them growing evenly.
Some fungal diseases may also cause leaf spots so ensure proper circulation, remove and destroy infected plant parts, and allow soil to dry between waterings.
Brown edged leaves may indicate an erratic watering schedule or exposure to cold drafts. Another cause of brown leaf edges is an accumulation of fertilizer salts on containers. If other issues have been eliminated and the brown edges continue, scrub the edges of the pot and flush the soil with clear water.
Most common insect pests on houseplants include scale, fungus gnats, aphids, spider mites and mealybugs. If the plant is heavily infested with scale, it is best to discard it. Fungus gnats can be greatly reduced by letting the plant dry completely between waterings. Aphids can be controlled by washing away with water or using insecticidal soap. Spider mites often affect already stressed plants so keeping plants healthy is the most effective control measure. Horticultural oil or insecticidal soap may be used for spider mite infestations. Mealybugs can be wiped away with a cotton swab soaked in rubbing alcohol.
When using pesticides, make sure they are labeled for indoor use and read and follow all label directions.
If the problems persist, horticulture educators and master gardener volunteers are available to provide assistance at Illinois Extension offices around the state. Local offices can be located at go.illinois.edu/ExtensionOffice.
Keep poinsettias plentiful long after the holidays
By Ken Johnson, Illinois Extension Horticulture Educator
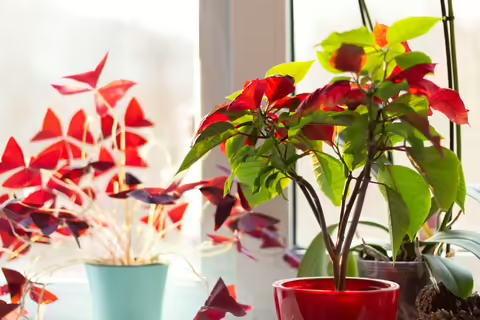
When it comes to the most popular holiday plant the winner is surprising. With their varying shades of cheery colors, poinsettias are the bestselling potted plant in the United States and Canada.
There are more than 100 varieties of poinsettias from the traditional red plants to pink, white, yellow and purple. If taken care of properly, their bright displays can last for several weeks says Ken Johnson, University of Illinois Extension horticulture educator.
“The colored parts of the plants aren’t flowers,” Johnson says. “They are actually modified leaves called bracts.”
The greenish-yellow flowers, cyathia, are in the center of the bracts. Poinsettias will drop their bracts and leaves once their flowers have shed all their pollen. So, for long lasting poinsettias, choose plants that have little or no pollen showing in their flowers.
One of the most longstanding myths about poinsettias is its toxicity.
“Contrary to popular belief, poinsettias are not poisonous,” Johnson says. “The misconception began in 1919 when an Army officer’s child allegedly died after eating a poinsettia leaf.”
While this was never proved and was later determined to be hearsay, the story has persisted. In fact, a study by Ohio State University showed that a 50-pound child would have to eat more than 1¼ pounds of the plant, 500 to 600 leaves, to have any harmful effects.
That being said, poinsettias may ooze a milky sap and some people that have latex allergies may have a reaction to it. This may also cause mild irritation and nausea in pets, so it may be best to keep them away.
Poinsettias are sensitive to extreme temperatures and cold temperatures can damage the bracts and leaves. Keep them wrapped when transporting them outside.
Once home, place poinsettias in indirect sunlight for six hours and make sure they aren’t touching windows. Poinsettias should have daytime temperatures around 60°F to 70°F and nighttime temperatures around 55°F. Warmer temperatures will shorten the length of the poinsettias display.
Poinsettias come wrapped in foil and plastic. If left on, make sure to poke holes in the bottom so water can drain out. Water poinsettias when the soil becomes dry and discard the excess. Waterlogged plants can get root rot and die.
After the holidays, fertilize poinsettias them once a month after they are done blooming.
For more information on poinsettias, visit go.illinois.edu/Poinsettia.
