Prolong the shelf life of garden-fresh produce with good harvest habits
By Bruce J. Black, Horticulture Educator, Illinois Extension
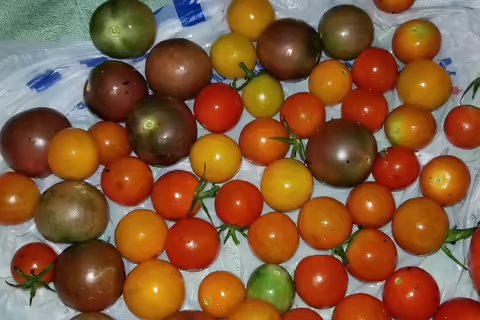
The fruits of our summer labors have been ripening, and soon, more fruits and vegetables will be ready for harvest. As gardeners, overplanting is a common problem, and it is a struggle to get the longest life out of the harvest.
“Most of us end up with more produce than we can use,” says Bruce Black, University of Illinois Extension horticulture educator. “Neighbors, friends, coworkers, and others usually benefit from the overflow.”
The quality of harvested produce follows an 80-20 rule.
Most of what happens after it is harvested, 80%, is decided by pre-harvest factors such as genetics, environmental, and cultural factors. The remaining 20% is determined by how the produce is handled after harvest.
Home gardeners often pick specific fruit and vegetable varieties for their flavor, fresh consumption, or preservation needs. They don’t pick varieties for their built-in resistance to diseases or response to natural environmental conditions.
“Unfortunately, we have yet to figure out how to control the weather or the amount of sunlight yards receive,” Black says.
How gardeners respond to fluctuating natural conditions, such as high winds or drought, can give plants a fighting chance. These cultural responses are the things we can control: irrigation, fertilizing, pulling weeds or using pesticides, and choosing when and how to plant and harvest.
While the 80% pre-harvest factors may have more influence, the post-harvest 20% can actually make a significant difference with produce.
Tips to improve post-harvest quality and extend shelf life:
- Take care to prevent dropping, bruising, or picking injuries.
- Harvest produce during the cool part of the morning to limit heat damage. Shade fruit left outside if picking large quantities at once.
- Store similar produce together for optimum temperature and humidity requirements in refrigerator crisper drawers.
- Store ethylene producing produce (apples, melons and tomatoes) and ethylene sensitive produce (peppers, green beans, cucumbers and lettuce) separately.
Ethylene is the natural gaseous plant hormone mostly responsible for ripening. When a fruit or vegetable is injured, four things happen: increased ethylene production, increased rate of respiration, increased water loss, and the creation of an entry point for pathogens.
Taking these factors into consideration as you harvest should help your produce have a longer post-harvest life and give you time to plan how to best enjoy your harvest. Given the investment of the time, money, sweat, and even tears you put into your garden, getting extra time to savor their flavors just makes gardening sweeter.
For more information on postharvest, check out University of Illinois Extension’s Watch Your Garden Grow website.
Benefit your health and environment by growing your own vegetables
By Nicole Flowers-Kimmerle, Horticulture Educator, Illinois Extension
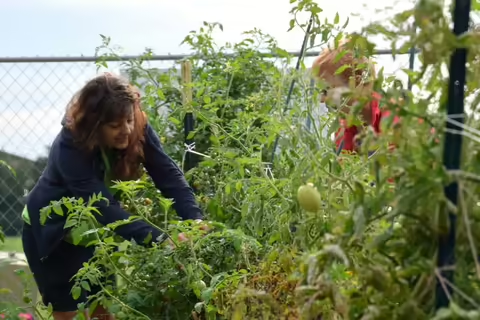
As summer comes to an end, many vegetable gardeners are busy reaping what they’ve sown and harvesting the fruits of their labors. Growing your own vegetables has health, nutritional, and environmental benefits, says University of Illinois Extension Educator Nicole Flowers-Kimmerle.
The health benefits are exponential with the combination of nutrients, sunshine, and exercise gained through gardening. Walking, bending, lifting, and pulling movements that naturally happen in the garden fit into the moderate excise category that can increase your body's immune system function.
Certain vegetables, such as broccoli, cabbage, and brussels sprouts, produce a disease-fighting compound called sulfurane after being cut. Colorful vegetables provide antioxidants such as lycopene and beta carotene. Eating a diverse group of vegetables ensures balanced nutrition.
“Different varieties of vegetables have different flavors,” Flowers-Kimmerle says. “Growing your own vegetables from seed allows you to choose varieties for your garden to suit your tastes.”
The flavor is also based on biochemical changes that happen to the produce once it is harvested. "The sugar in sweet corn kernels starts converting to starch as soon as the ear is harvested," Flowers-Kimmerle says. “Cook sweet corn as soon as you can for the sweetest flavor.”
Harvest timing can also affect the flavor of a vegetable. Harvesting vegetables at their peak ensures maximum flavor. Locally grown vegetables benefit the environment by reducing carbon emissions from burning fossil fuels to transport grocery store produce.
“No plastic packaging is required when you harvest vegetables straight from the garden, which also reduces fossil fuel inputs,” Flowers-Kimmerle says. Pesticide and other chemical inputs tend to be lower in small, well-tended gardens than even small farms.
When vegetable gardeners use kitchen and yard waste as compost, they keep it out of landfills and create their own soil amendment to increase the garden's productivity.
These health and environmental benefits can last even longer with cool weather plantings for a late fall harvest. Vegetables that grow well in cool weather, such as leaf lettuce, radish, spinach, and turnips, can be planted throughout August. Visit the Illinois Extension website Vegetable Garden Guide at web.extension.illinois.edu/vegguide for planting dates. For more information on how to start a fall vegetable garden, contact your county Illinois Extension office or visit extension.illinois.edu.
Harvest abundant squash for food, decoration
By Jennifer Fishburn, Horticulture Educator, Illinois Extension
Winter squash is a tasty, nutritious fall treat that comes in a variety of sizes, shapes, colors, and flavors. There are hundreds of varieties available to grow and enjoy on the dinner table.
“A few of the more popular winter squash include butternut, acorn, spaghetti, and butternut,” says Jennifer Fishburn, University of Illinois Extension horticulture educator serving Logan, Menard and Sangamon counties.
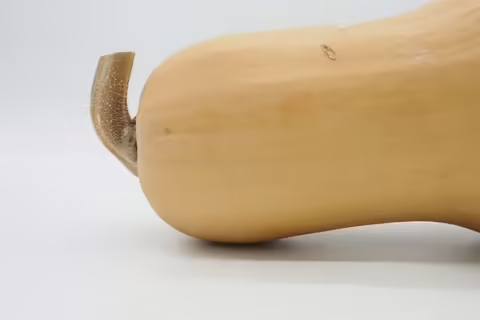
- Butternut squash is one of the most popular. This long, pear-shaped squash is tan, with a thin rind that is easy to cut or remove with a vegetable peeler.
- Acorn squash is a small squash that resembles an acorn and is available in a variety of skin colors, including dark green, gold, and white.
- Spaghetti squash, as its name suggests, resembles pasta strands when cooked. The strands can serve as a low-calorie, low-carbohydrate pasta substitute.
Harvesting and storing winter squash
Squash, a fruit, is generally harvested in September or October and must be harvested before a hard frost. A light frost will kill the vines, but won’t harm the fruit.
“Unlike summer squash, such as zucchini, which is harvested in the immature stage, winter squash is harvested when the fruit is mature,” Fishburn says. Their rinds are dull, dry, and hard and cannot be punctured with a fingernail. Rinds should be free of cracks and soft spots. Use caution not to injure the rind during harvest.
When cutting squash from the vine, leave a 2- to 3-inch stem. Avoid handling fruit by the stem since the weight of the fruit can cause the stem to break. Most winter squash, with exception of acorn and delicate, benefit from a curing process. To cure, place squash at a temperature of 70°F to 80°F for 10 days.
Winter squash have a long shelf life if stored properly. Acorn squash can be stored up to two months, butternut up to three months, and hubbard up to six months. Optimum storage conditions for most winter squash harvests is around 55°F with a 50% to 75% humidity in a cool, dark location with good air circulation. If possible, store squash in a single layer and keep fruit from touching each other. All winter squash except hubbards should be stored with stems attached.
Eating winter squash
Most winter squash can be baked, boiled, or steamed. Fishburn cautions that the hard, tough rind is a challenge for most cooks.
With the exception of spaghetti squash, winter squash is often eaten as a sweet or savory side dish. Squash can be flavored simply with salt and butter or with warm fall spices, such as cinnamon, ground cloves, nutmeg, or basil and sweetened with brown sugar, maple syrup, or honey.
Squash’s dense texture holds up well in soups, stews, chili, and casseroles. The flesh can also be used in pies, muffins, and cakes.
Hold on to summer with home hydroponics
By Chris Enroth, Horticulture Educator, Illinois Extension
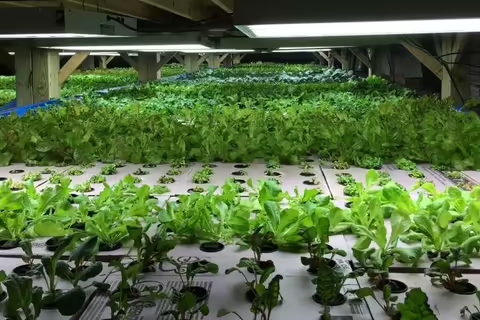
Just because summer is over, doesn’t mean you have to stop gardening. Hydroponic systems allow year-round growing
The year 2020 has created a lot of new gardeners, says Chris Enroth, University of Illinois Extension horticulture educator. Some may have dabbled in hydroponics, the process of growing plants in a liquid nutrient solution without the use of soil.
“When it comes to gardening in the ground, it is important to manage the soil,” Enroth says. “Hydroponics shifts that focus to managing the nutrient solution. It’s not any less or more work, you’re just modifying your practices.”
What options do home gardeners have when it comes to growing plants hydroponically?
There are several at-home hydroponic systems sold by various companies. Some come with all the materials you need. Nutrients are pre-measured and applied based on the manufacturer’s instructions. Some even come with an app that walks users through the process of growing hydroponically.
While commercial at-home systems are convenient, they can be pricey
Many home hydroponic growers begin their journey with a passive system using simple plastic storage tubs with a locking lid. Choose a container that is not clear or opaque to avoid light getting to the liquid solution which will encourage algae growth.
“Cut round holes in the lid sized to suspend a netted plastic pot in the tub’s nutrient solution, but narrow enough so the lip of the pot cannot slip through,” Enroth says. ”The plant and the roots still need some type of structural support in the plastic pot. This is done with soilless media such as rock wool, perlite, coconut coir, expanded clay, or coarse sand."
An air stone attached to a pump helps inject oxygen into the solution and keeps the water moving. These can usually be found wherever aquariums are sold.
The biggest investment for an DIY hydroponics system?
This will likely be the EC, electrical conductivity, meter and pH meter. Some are priced as low as $20, while others are more than $200.
“Keep in mind this nutrient solution is your ‘soil,’ ”Enroth says. “Instead of a tiller, you are buying tools to manage your solution.”
EC meters measure the amount of salts in the solution, which gives an idea of how much nutrition is available for the plants. The pH meter measures the water’s acidity or alkalinity, which will vary by source. Most plants do well in a slightly acidic range of a 5 to 6 pH level, Enroth says.
With the EC and pH measurement readings, users can adjust the nutrient solution as needed. “I’ve often found kits that include the meters and amendments take most of the guesswork out of managing the nutrient solution,” Enroth says.
One crucial component is supplemental light. An inexpensive shop light works well, and new LED technology is promising for indoor plant production.
Plant choice is important for indoor hydroponic systems:
- No: Tomatoes, zucchini
- Yes: lettuces and herbs
“We grew basil in our hydroponic system and it did exceptionally well,” Enroth says. “Even if you don’t eat it, we just loved brushing against the leaves as winter sets in to give us a feeling of summer.”
Harvest milkweed pods; plant Monarch butterfly garden
By Kelly Allsup, Horticulture Educator, Illinois Extension
Illinois needs to plant milkweed, and a lot of it, over the next 18 years to ensure the state’s official insect, monarch butterflies, survives.
Kelly Allsup, University of Illinois Extension horticulture educator, says the task of planting 150 million new milkweed stems by 2038, championed by the Illinois Monarch Project, needs public buy in.
“Major statewide strategies, such as updated roadside mowing guidelines, creating habitat in natural areas, and allowing it to grow in farmland not in production, may not be enough,” Allsup says. “Monarchs may need homeowners to plant a larger patches of milkweed.”
The prairie state, as its name suggests, was once covered in grasses and flowers that were habitat and food for migrating butterflies. Development has reduced the availability of milkweeds, which is the only food source for monarch caterpillars. Monarchs (Danaus plexippus) will be considered for inclusion on the Endangered Species list in December 2020.
Anyone can grow milkweed in their yard or garden, Allsup says. “Do you have an alley that does a good job at growing weeds? Perhaps you are ready to move on from a ditch full of daylilies, or you have an empty garden bed. One 10-square-foot garden can hold 150 stems of milkweed.”
Harvesting and germinating milkweed seeds
While there are a number of different species of milkweed, monarchs prefer swamp milkweed (Asclepias incarnata), Butterfly weed (Asclepias tuberosa), Common milkweed (Asclepias syriaca), Prairie milkweed (Asclepias sullivantii), and Whorled milkweed (Asclepias verticillata).
“With permission from landowners, you can pick milkweed seed pods this fall rather than buying seeds or purchasing plants,” Allsup says. “Once harvested, you can either plant them in the fall or wait until spring.”
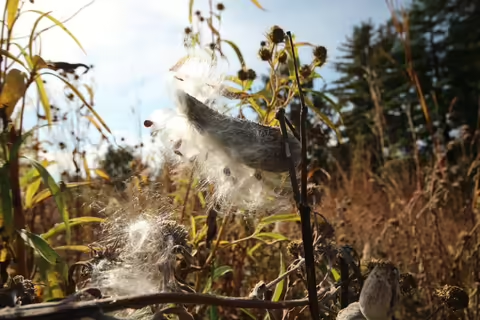
Each pollinated milkweed flower forms one to two large teardrop-shaped green pods that turn brown or maroon as they mature.
“Pick pods when they are dry and just starting to split open,” Allsup says “Seeds can’t germinate if they have not been allowed enough time to mature on the plant.”
Allow pods to dry out then pry them open and separate the seeds by holding one end and stripping the seeds away from the white fluff known as floss.
“Another way to separate the mature seeds from the floss is to place the seeds in a paper bag with a coin,” Allsup says. “Cut a hole in the bottom of the bag so the seeds fall out after a good shaking.”
Once you’ve harvested the seeds you can plant them this fall or store seeds in a dry and cool place in a labeled paper envelope with species, date, and location to plant them in the spring.
Milkweed seeds need to be stratified and require cool moist conditions, to germinate. Growers can accomplish this at home by placing seeds in a damp paper towel in the refrigerator for four to six weeks. Start seed germination in early April to have them ready for planting after the last frost in May.
Steps to planting milkweed
- Clear out any weeds or existing plants and water the soil.
- Place germinated seeds about 12 inches apart and 1 to 2 inches deep. Tip: Plant two seeds per hole and if they both germinate, remove the weakest one.
- Cover with moist soil.
- Put flags or bamboo sticks near your planting holes and mulch with straw.
- When the seedlings come up, consider transplanting or culling plants to achieve 2 foot spacing.
- Weed aggressively every two weeks as the plants grow bigger. A fertilizer can be used when the seedlings start to grow to give them a jump start, but after that, fertilizer is generally not needed, Allsup says.
“Milkweed gardeners can record their efforts so the Illinois Monarch Project knows if they are reaching their goal,” Allsup says. Milkweed plantings can be submitted at monarchwatch.org/waystations/#register. Illinois gardeners can also register their habitat as a Pollinator Pocket or Monarch Waystation at extension.illinois.edu/cfiv/pollinator-pockets.
Bring houseplants indoors before the first frost
By Ken Johnson, Horticulture Educator, Illinois Extension
As fall draws near, it’s time to bring houseplants inside for winter. Many houseplants are native to tropical and subtropical climates and do great outside in Illinois in the summer, but cannot tolerate cold temperatures.
“When temperatures drop below 55°F, it’s time to bring plants indoors,” says Ken Johnson, University of Illinois Extension horticulture educator. “Be sure you don’t also bring in unwelcome guests.”
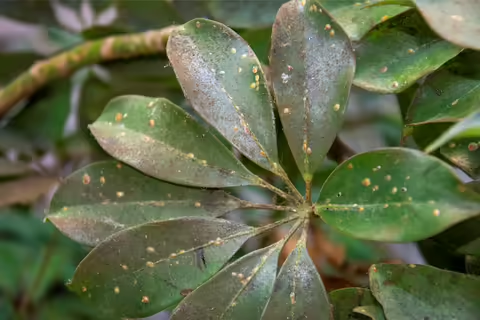
Insects, such as aphids, whiteflies, scale, and spider mites are pests commonly found on outdoor plants. Inspect plants for any insects and other pests before bringing them indoors. Once inside, populations can rapidly increase and spread to other plants.
Before resorting to insecticides, spray foliage with a steady stream of water. “If spraying doesn’t work, insecticidal soaps can be used to eliminate soft-bodied insects,” Johnson says. "Follow label instructions.”
If plants are infested, it may be prudent to dispose of them.
In addition to the foliage, Johnson recommends checking the soil. Insects, such as earwigs and ants, will move into soil in potted plants. Flush pots with water to drive out insects. If ants are present, the plant may need to be repotted.
Over a period of about a week, gradually reduce light levels by moving plants to increasingly shadier areas. This will start to acclimate them to light conditions indoors. Once plants are indoors, put them next to the brightest, sunniest window, typically south or west facing. If you don’t have a sunny location, provide supplemental lighting.
Plants grow slower indoors, so will need less water and fertilizer. For most plants, allow the soil to dry slightly between watering, Johnson says.
“One way to check soil moisture is with your finger,” he says. “Stick your finger in your potting media up to your second knuckle. If the media is still moist, you don’t need to water.”
If the pot feels light when lifted, it may be time to water.
Plants can be watered by top or bottom. If top watering, apply enough water so that some water comes out the drainage holes at the bottom of the pot. This may need to be done more than once if the soil is very dry. If you have a saucer under the pot, make sure to empty the water out after half an hour or so. This will allow the potting mix to absorb additional water, but prevent the mix from becoming saturated.
To water from the bottom, fill you’re a plant saucer or sink with a few inches of water and let plants soak. Once the potting mix on the top of the pot is moist, the plant can be removed from the water.
Plants often drop leaves and yellow when they are moved indoors. Increasing humidity levels around plants and providing supplemental lighting can help reduce leaf drop, Johnson says. Over time, plants will acclimate to their new environment.
Select and plant spring-flowering bulbs now
By Brittnay Haag, Horticulture Educator, Illinois Extension
As fall approaches, many perennial plants are ready to go dormant for the winter. Now is the time to start thinking about next spring’s floral display and planting spring-flowering bulbs.
Since spring bulbs need a cold period during the winter in order to bloom, the best time to plant is late September through October to allow sufficient time for a good root system to develop, says Brittnay Haag, University of Illinois Extension horticulture educator.
“Investing a little time and money in the fall will pay off greatly next spring when you start seeing pops of color blanketing your garden,” Haag says. “Depending on the location, spring bulbs, such as snowdrops, begin blooming in late February and continue until late June with alliums.”
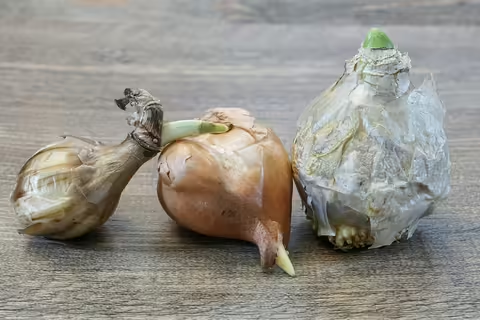
Bulbs should be firm and free of rotting spots or signs of disease. “When buying bulbs, keep in mind that larger bulbs will produce larger blooms,” Haag says.
If the bulbs cannot be planted immediately after purchasing, store them in a cool, dry place away from ethylene-producing fruits, such as apples, bananas, melons, pears, and peaches to prevent flowering disorders.
For the greatest visual impact, plant bulbs in groupings and large drifts or waves of color. Mix them in with other perennials and shrubs to screen the foliage after blooms fade. To produce maximum blooms, most bulbs will need at least eight hours of sunlight daily.
Most bulbs require fertile, well-drained soil to prevent the bulb from rotting. Poorly drained soil can be improved by adding organic matter such as compost or peat moss. The material should be incorporated into the soil before planting at a rate of four-parts soil, one-part organic matter. A balanced fertilizer, 20-20-20, can also be incorporated into the soil at this time.
“The general rule of thumb when planting bulbs is to plant them two to three times the length of the bulb, measured from the bottom of the bulb,” Haag says.
Large bulbs, such as daffodils or tulips, should be planted 6 to 8 inches deep. Small bulbs, such as snowdrops and crocus, should be planted 3 to 4 inches deep. Bulbs should be spaced 6 to 12 inches apart to allow for the spread and future divisions. Plant bulbs with the nose of the bulb facing upward and the root plate facing down.
After covering the planted bulbs with soil, water the area well to settle the bulbs into the soil and initiate root development. If there is little rain in the fall, continue to water weekly until the ground freezes. A light, 2-inch layer of mulch can be added after planting to minimize effects of winter temperature fluctuations and to help converse soil moisture.
“Spring bulbs can vary in flower color, timing, height, and shape depending on the species and variety,”says Haag. “Add a new type of bulb each fall to have a beautiful mix of spring bloomers in your garden.”
Visit Illinois Extension's website for more information about spring bulb selection.
Plant native perennials in the fall for healthy spring growth
By Austin Little, Horticulture Educator, Illinois Extension
Retailer shortages of the most popular native perennial plants were common this spring as there was an unprecedented run on supplies. But fall is another great opportunity to plant, says Austin Little, University of Illinois Extension horticulture educator.
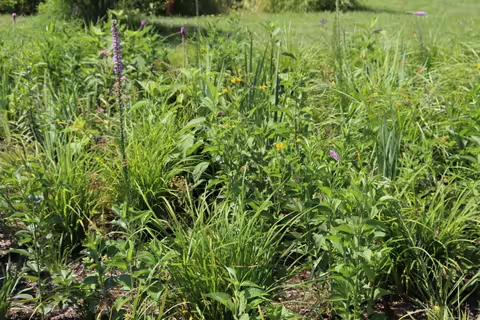
It’s often recommended to plant herbaceous natives like butterfly milkweed or echinacea from transplants in the spring; however, planting in fall has a few more benefits than spring, such as improved establishment and flowering in the following spring, better vigor, and greater weed suppression, Little says.
Native plants are a critical part of our ecosystems and contribute to beneficial insects, birds, wildlife, and important microorganisms living in and on soils.
In the fall, soils hold onto heat longer even as above-ground temperatures are dropping, which is ideal for new root structures to grow. The root systems need time to establish new micro or feeder roots which helps the transplant to acclimate, then gradually go into dormancy as colder winter temperatures arrive. Fall transplants have better root structure and more time to acclimate to the local environment.
Herbaceous native perennials transplants or seeds can be ordered online or from a local nursery. Plugs are easier to plant and establish quicker. They need to be planted about six weeks before the first frost of fall. In Southern Illinois, the first frost date is historically in the last two weeks of October. Northern Illinois is a week or two sooner than that, so be sure not to plant too close to the first frost.
“If direct seeding, wait until the first hard frost to apply the seed to a weed-free bed with open soil so the seedlings do not germinate prematurely,” Little says. “Most native herbaceous perennials have very small seeds and need only a thin layer of soil and mulch to undergo the chilling process known as stratification.”
Transplants need to be thoroughly watered when they are installed. To encourage deeper root growth, it’s better to water less often but more deeply, once or twice a week for about 30 minutes depending on rain and temperature. When it’s getting close to the average first frost date, Little says it’s a good idea to back off on the water.
“Even if it warms up a bit in late fall, it’s best to hold off on watering to avoid interrupting the hardening off process,” he says.
Fertilizing in the fall is not recommended. Many native herbaceous plants are adapted to lean and low fertility soils. Adding nitrogen and other nutrients in the fall may cause the transplant to put energy into new vegetative growth that will be damaged by winter conditions and suppress the establishment of roots. Hold off on fertilizing until early spring, Little recommends
Do add a 2- to 3-inch layer of mulch or compost around the base of plants, making sure to leave some open space around the stems to avoid harboring unwanted pests and moisture build up. Fall plants don’t need to be mulched immediately after planting and can benefit from the sun warming the soil. Mulching can wait until night-time temperatures are in the 32°F range. By adding mulch, such as straw or finely shredded hardwood wood, and making sure plants are well anchored in the soil, frost heaving can be avoided.
Adding fall compost around any new plants is also recommended. By spring, most of the compost will be broken down and ready to be taken up by plants with root structures that have a head start on spring transplants.
Tips for fall planting native perennials
- Order and buy plants with enough time to plant six weeks ahead of the first frost.
- Water deeply once or twice a week, then stop watering after the first hard freeze.
- Help overwinter fall transplants with mulch and compost.
- Do not fertilize new transplants until spring.
Planting trees boosts curb appeal and benefits the urban environment
New homeowners often wonder about the value of planting shade trees when they first move in when there are so many more areas to focus on with a new home.
“Planting shade trees is an investment for the future just like other home upgrades,” says Richard Hentschel, University of Illinois Extension horticulture educator. “A smaller, young tree will be cost effective and will increase in value along with your home as well as providing indirect benefits.”
Trees can be planted throughout the year, depending on how they were grown. Fall and spring are prime times homeowners can consider a planting project to provide the extra care and time needed during transplant recovery.
Environmentally, there are several positives that come from having shade trees in the home landscape. The recent devastation caused by the invasive Emerald Ash Borer has taught developers the need for shade tree diversity. A single tree species and its cultivars should make up no more than 20% of the urban forest in order to survive stressful environmental conditions such as repeated droughts and severe winter conditions.
“Younger trees tolerate these conditions better than older trees, so new trees need to be continually planted,” Hentschel says.
A big benefit for human health is a tree’s ability to generate oxygen while reducing carbon dioxide in the atmosphere by collecting and storing carbon as they grow and mature. You’ve heard about industry carbon credits? Well, trees have always done this.
Shade trees also absorb water and hold soil in place, two benefits during severe weather conditions such as floods.
Trees support insect populations that create the balance of nature and are part of the natural food chain. Illinois white oaks support more than 500 insect species throughout the growing season, mostly butterflies and moths. Their caterpillars are not only the main food source for migrating and breeding birds, but also are essential food for baby birds. That shade tree supports birds, squirrels, and more wildlife by providing food and shelter.
One big benefit of shade trees for homeowners can be the long-term energy savings. An air conditioner will not work as hard or stay on as long when your house is shaded by trees. Temperatures can easily be 5 degrees or more cooler in the shade.
“It’s estimated that one tree is the equivalent of 10 window air conditioner units,” Hentschels says. “Two trees shading the west side of a home from the harsh afternoon summer sun have the potential of reducing cooling costs by 30%.”
In the winter, a deciduous tree allows sunshine to warm the home and the windowsill providing a nice warm spot for a cat.
There is no doubt the value of a home is increased when surrounded by mature shade trees, but they also encourage neighborhood socialization.
“There is a growing body of research that indicates plants and trees are a major benefit to mental health,” Hentschel says. “They also provide a sense of unity.”
Aesthetically, they offer beauty with springtime blooms and greenery and come fall the bright reds, yellows and golds of changing leaves. If there is shade to gather in and talk, adults are more likely to stop and pass the time as children climb tree branches or play in a tire swing.
For more information about selecting a tree for the home landscape, visit web.extension.illinois.edu/TreeSelector.
Fall flowering witch hazel charms home gardens
By Gemini Bhalsod, Horticulture Educator, Illinois Extension
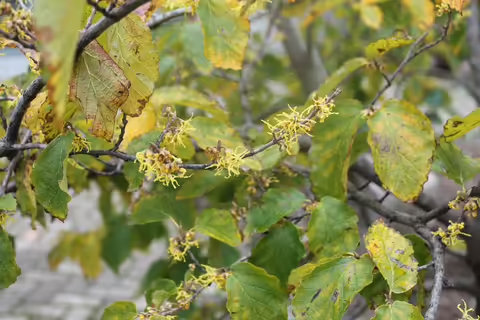
With a name befitting the season it blooms, common witch hazel is a fall favorite for Illinois gardeners looking to add a small tree with character to their yard.
“People are very interested in plants that add some interest to their landscape in fall and winter,” says Gemini Bhalsod, University of Illinois Extension horticulture educator. “Common witch hazel is one of my favorites because it supports pollinators and has unusual yellow flowers.”
There are many different witch hazels, all in the Hamamelidaceae plant family. Common witch hazel, or Hamamelis virginiana, is native, although it is uncommon in natural areas as Illinois is the western edge of its native range.
“Witch hazel is a beautiful addition to any garden because of its linear yellow flowers,” Bhalsod says. “The long, thin petals give the small flowers an interesting texture that stands out in the fall.”
Since common witch hazel blooms late in the year, its flowers blend in nicely with the colorful turning of the leaves. In Northern and Central Illinois, it flowers around mid-October, and in Southern Illinois, near the end of October.
Witch hazel is susceptible to few pests and diseases making it a great low-maintenance addition to any landscape. It even supports wasps, flies, and various moths.
“You might not think of flies or small wasps when you think of pollinators, but just like bees and butterflies, they are important to our ecosystem,” Bhalsod says. “Witch hazel also provides crucial cover for birds, who also eat its seeds.”
Take an inventory of the conditions in your yard before planting a witch hazel tree in early spring. Witch hazel is also sometimes called a large shrub because it might have one trunk or multiple trunks, but it can grow to be about 20 feet tall. It provides enough screening for edges and borders, but also works well as an understory tree.
It blooms the best when planted in part-sun, but it is adapted to many different growing conditions and is relatively shade tolerant. It works well in sandy to loamy soils with good drainage.
Find more information about witch hazel on the Garden Scoop blog.
Exfoliating bark trees add great appeal
By Andrew Holsinger, Horticulture Educator, Illinois Extension
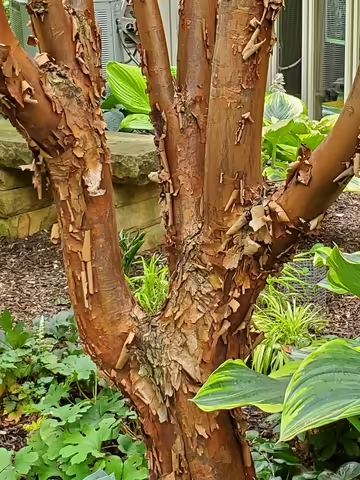
There are plenty of ornamental features to get excited about when it comes to trees, but one interesting feature often gets overlooked: exfoliating bark.
“Exfoliating bark is amazing all year long,” says Andrew Holsinger, University of Illinois Extension horticulture educator. “And some varieties of trees have an amazing color contrast.”
The process of shedding bark, or exfoliating, is normal for some trees. Weather influences this process, including how much of bark is shed in a season.
A word of caution though: peeling or exfoliating bark is not a good sign for trees that don’t naturally exhibit this bark characteristic and can be a sign of problems.
“Bark can be a helpful identification characteristic when identifying trees,” Holsinger says. “Some Illinois native trees with exfoliating bark include sycamore, river birch, bald cypress, ironwood, and eastern red cedar.”
The bark of most young trees is smooth and thin. As the tree matures, the bark becomes thicker, protecting the tree. The outermost layer of bark dies and naturally sloughs off, but with exfoliating trees, this layer peels and reveals the inner layers of bark.
Even in the actively growing state, Holsinger says, the exfoliating bark is a nice feature that can add to the uniqueness of the home or urban landscape.
Exfoliating bark trees provide a great home for bats. Many of bat species native to Illinois use trees with exfoliating bark for summer roosting and maternity colonies.
Some exfoliating bark species are fire resistant. The bark acts somewhat like an insulator protecting the tree.
The following trees have exfoliating bark characteristics and can create a focal point for your landscape:
- Bald Cypress (Taxodium distichum)
- Birch (Betula spp.)
- Black cherry (Prunus serotina)
- Dawn redwood (Metasequoia glyplostroboides)
- Eastern red cedar (Juniperus virginiana)
- Ironwood/hophornbeam (Ostrya virginiana)
- Lacebark elm (Ulmus parvifolia)
- Paperbark maple (Acer griseum)
- Redbud (Cercis canadensis)
- Scotch pine (Pinus sylvestris)
- Shagbark hickory (Carya ovata)
- Sycamore (Platanus occidentalis)
- Zelkova (Zelkova serrata)
Fall is a great time for planting trees
By Ryan Pankau, Horticulture Educator, Illinois Extension
Most people think of spring as the ideal planting time for trees and shrubs, but fall offers a nice planting window with some added benefits.
“Fall is my favorite time of year to establish woody plants,” says Ryan Pankau, University of Illinois Extension horticulture educator. “With temperatures cooling off, roots need less moisture. And, Illinois typically gets enough fall rains to help ensure adequate soil moisture going into winter.”
All trees and shrubs experience transplant shock, which can last two to three years, sometimes even longer. To overcome transplant shock, trees and shrubs need to expand their root system beyond the planting hole. A mature tree will typically have a root system two to three times wider than the spread of its limbs. When you think about that ratio for a newly planted tree, it takes considerable time to develop an adequate root system.
The most common mistake when planting a tree is digging a hole that is too deep.
“We can really help a tree overcome transplant stress by digging a shallow, wide planting hole,” Pankau says. “A wide hole with well-loosened soil where the edges are roughed up provides a nice space for roots to grow into the native soil.”
Planting holes don’t need to be deep because most of the tree roots are concentrated in the upper 12 to 18 inches of soil. Trees need to be planted at the proper depth, which is typically shallower than expected.
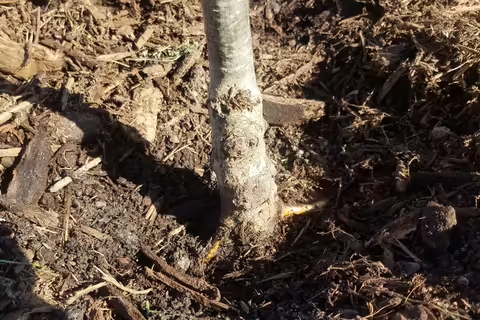
To determine the proper planting depth, start by identifying the root flare, or trunk flare, on a new tree. The flare is the portion of the trunk at the bottom of a tree that begins to flare out, or taper out, as trunk tissue transitions into root tissue. The flare needs to be even with the soil surface.
Trees that are planted too deep struggle to establish and often suffer from a lifetime of other issues. Improper depth is the most common mistake in tree planting because the depth of the tree’s original container, or root ball on balled and burlapped trees, is misleading.
“The root flare of the tree is commonly buried in the pot or down in the root ball on most nursery stock,” Pankau says.
If the root flare on your new tree is not easily identifiable, gently dig down into the container or root ball to search for the first root or roots coming out of the trunk. A young tree will have little trunk taper, making the first roots the best indicator of the root flare.
Mulch provides the finishing touch by adding a protective layer to the soil that retains moisture and prevents roots from freezing. Apply a 2- to 4-inch layer of mulch as wide as your planting hole was dug.
Next spring, the tree will awaken from dormancy and its winter rest with a full canopy of green leaves.
Select the right tree for fall planting in Illinois
By Nancy Kreith, Horticulture Educator, Illinois Extension
After spring, fall is the next best time to plant a tree. When adding trees to the landscape, it’s important to research and make a suitable list of tree species. Select a proper planting location based on mature size, preferred soil conditions, disease and pest resistance, and multi-seasonal interest, says Nancy Kreith, University of Illinois Extension horticulture educator.
“While shopping for trees at a garden center, inspect them carefully before purchasing,” Kreith says. “Look to make sure no roots are exposed. Inspect the trunk for damage, such as cankers. Be sure the container or root ball is the appropriate size compared to size of tree canopy and that trees have been watered on a regular basis.”
There are many tree species that do well throughout Illinois’ zones. These trees are appropriate for fall planting and includes native and non-native species:
- Kentucky coffee tree (Gymnocladus dioica): This Illinois native grows 60 to 75 feet tall and prefers full sun and moist, well-drained soils. It has fragrant, white flowers in the spring and persistent fruit pods. Pods can be messy, so consider a male cultivar. There are no serious pest problems and the Kentucky Coffee tree is adaptable to urban conditions, tolerating drought and pollution.
- American elm ‘New Harmony’ (Ulmus americana ‘New Harmony’): Although an Illinois native, this cultivar or another resistant cultivar, should be planted due to risk of Dutch elm disease. This tree grows up to 40 feet tall and prefers full sun and moist, well-drained soil; however, it will tolerate a range in soil pH and is wind and heat tolerant. It features a picturesque vase shape and has a nice yellow fall color. Morton Arboretum offers a list of pest resistant American elms.
- Downy serviceberry (Amelanchier arborea): This 10- to 30-foot tall Illinois native requires little maintenance and is best transplanted balled and burlapped. It features smooth gray bark, excellent fall color, and slightly fragrant white flowers in mid-spring. Best placement is in full- to part-sun and moist- to dry-conditions with well-drained soil.
- Redbud (Cercis Canadensis): This Illinois native grows 15 to 30 feet in height and prefers part sun and rich, moist, well-drained soils. Pink blossoms occur in mid-spring before leaves appear. Seedpods can persist through winter. This tree is naturally short-lived. If dieback occurs, cutting it to the ground encourages sucker growth than can become a substantially-sized tree.
- White fir (Abies concolor): White fir grows 30 to 50 feet high. This pyramidal evergreen tree that prefers full- to part-sun and moist, well-drained, sandy soils. It is valued for its silvery green foliage and useful for screening or as a specimen tree. It is relatively pest free and performs well in Midwest conditions.
- Limber pine (Pinus flexilis): This 30- to 50-foot-tall evergreen tree prefers full- to part-sun and moist, well-drained soils. This long-lived species works well as a specimen tree. It is adaptable to dry soils, windy sites and is more tolerant to salt spray than most pines.
- Serbian spruce (Picea omorika): This evergreen grows 50 to 60 feet high and prefers deep, rich, moist, well drained soils. It tolerates part-shade and urban conditions, except for pollution. It serves as an excellent specimen tree, with dark green needles and contrasting white on the underside.
Consider cultivars bred for certain characteristics. Redbud ‘Lavender Twist’ is a weeping form that reaches 4 to 5 feet high. Serbian spruce 'Sky Trails' has a weeping habit, with blue-green needles and contrasting white underneath. Kentucky coffee tree 'Espresso' features a vase-shape, and its male cultivar will not produce fruit.
Wait until spring to plant trees, such as hemlock, willow, river birch, white oak, bald cypress, ginkgo, sweetgum, magnolia, American hophornbeam, or hornbeam since establishment is often difficult and slow, Kreith says.
For more information about tree selection, please the Illinois Extension tree selector website.
Put fall leaves to work as compost
By Sarah Vogel, Horticulture and Natural Resources Educator, Illinois Extension
This fall use leaves to grow next year’s healthier garden. By adding fallen leaves to compost, homeowners can save money, improve soil quality, and act more environmentally friendly.
“The science behind composting may sound technical, but it is as simple as throwing leaves and food scraps in a pile and using a shovel to move it around,” says Sarah Vogel, University of Illinois Extension horticulture educator. “Composting can be a great way to reduce the amount of biodegradable material entering landfills and save money by reducing lawn bag use.”
Compost is organic material, meaning it comes from an organism that was once alive. Composting is the breakdown of organic material through controlled decomposition. This decomposition can occur aerobically with oxygen, anaerobically without oxygen, or sometimes, even with worms.
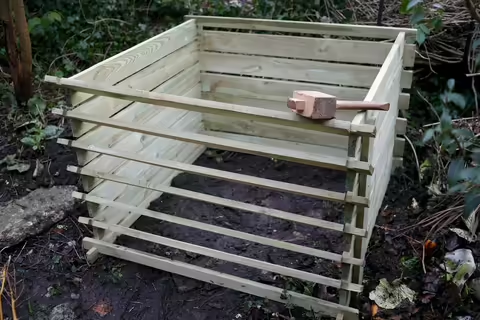
Aerobic composting, or allowing oxygen into the mix, can be accomplished on the ground or in a tumbler. A tumbler is a receptacle that keeps things tidy and is easy to turn but dries out faster and does not receive beneficial microbes from the soil unless added. For those who have a small garden or do not produce a lot of organic waste, a tumbler may be a good option.
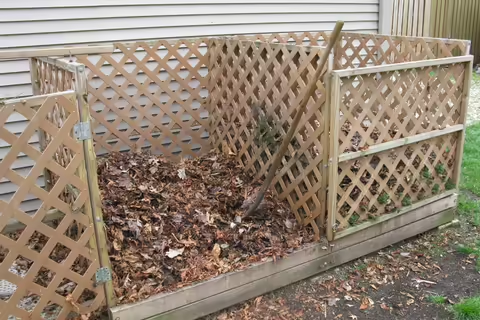
“Many people compost in a pile or a bin system,” Vogel says. “There are several do-it-yourself bin systems also available for purchase. A pile is a very simple way to start and easy to access when turning the compost.”
Depending on the size of the compost pile, what is added, and how often it is tended, compost can take anywhere from 90 days to two years to become usable. Using the three-bin or three-pile method, each of the three piles are in varying stages of development: new, partly aged and usable. Composters can speed up the process by turning more frequently.
To start a compost pile, select a shady spot as moisture content will remain important for decomposition. To create good compost, use one-part green materials (the nitrogen component) and two parts brown materials (the carbon component). Add greens and browns in alternating layers, occasionally adding non-glossy newspaper or a bit of soil. Turn every 30 days to aerate and mix.
- Greens: Kitchen scraps and coffee grounds, fresh grass clippings, livestock manure.
- Browns: Fallen Leaves, non-glossy shredded paper or cardboard, wood ash, straw, sawdust, hair trimmings.
- Do not compost: Diseased or pesticide treated plants, weeds with seed heads, twigs, meat or bones, dairy products, human or pet waste.
Compost will produce heat as a by-product of the microbial breakdown of organic material. The amount of heat will depend on the size of the pile, moisture content, aeration, and the carbon-to-nitrogen ratio. When the compost is ready, it will be dark in color and smell earthy and rich.
How a compost smells will tell you a lot about how to troubleshoot any issues.
- For an ‘off’ odor, add browns.
- Damp and smells sweet, but not heating up, add greens.
- Ammonia smell, add browns.
- Compost is dry, add material in layers and cover to lock in moisture.
For more information contact your local Extension office, or visit the Illinois Extension composting website.
Fall garden cleanup lays groundwork for a successful spring
By Martha Smith, Horticulture Educator, Illinois Extension
Don't put that trowel and rake away yet. Fall may end this year's gardening season, but it is the perfect time to begin preparations for next year. Taking care of a few details now means fewer chores, pests and problems next spring.
Take stock
The first step is taking stock of how your garden fared this year. Do a walk-through and take notes on plant location and performance, says Martha Smith, University of Illinois Extension horticulture educator.
“You should sketch out your vegetable garden,” Smith says. “Crop rotation is very important when it comes to vegetable diseases. In the spring, you can refer to your sketch rather than rely on your memory and plant vegetables in different locations.”
Perennials and annuals should also receive a year-end review. Note whether this season's plants met expectations or if different plants and varieties are needed for next year. Perhaps choosing a different location for certain varieties will help their performance. Do any perennials need to be divided? Do it now or make a list for next spring.
Landscape clean up
Diseased plants should be completely removed. Healthy plant debris can be added to your compost pile. If any perennials have been seriously and routinely plagued with disease, fall is the time to discard them before they spread problems to other plants.
After the first frost, remove annuals and cut back tops of tall herbaceous perennials. Many gardeners prefer to leave most of their perennials as they are, cutting them back in the spring. Tall perennials more than 3 feet tall will flop over under the weight of snow or ice and create environments for rodents and other wildlife; many may reseed..
“I always cut seed heads off of Northern Sea Oats (Chasmanthium latifolium) and Blackberry Lily (Belamcanda chinensis) before they spread,” Smith says. “But if you want more, let them be.”
Fall bulbs
Dig up tender bulbs such as gladioli, dahlia, and canna lilies. Dry them, and store over winter in a cool, frost-free area. Garden centers have hardy bulbs such as tulips, daffodils, and crocus in stock now. Check out the selection and plant in October and November for spring blooms.
Leaves in the landscape
Rake leaves and add them to your compost pile or locate them near the garden so they are handy to add as mulch next spring and summer.
Don't let fallen leaves accumulate and mat down over your desirable turf. After the heat of summer, grass is actively growing in the fall. Leaves smother the grass and prevent photosynthesis which is the plants ability to produce food. Consider using fallen leaves as winter mulch around tender plants.
Container plants
Container plants should be pulled and added to your compost pile. Saving potting mix to replant for next year is difficult. Roots are not going to disappear over winter and you will have to deal with them sooner or later. Potting mixes will also lose their organic matter content since it breaks down through the growing season.
Throw roots and media in the compost pile if this is the case and clean out the container with a mild bleach solution of 10-parts water, one-part bleach.
If saving the soil for next year, store it in a dry area or cover it with plastic to keep out debris and prevent it from getting waterlogged.
“Now, you can begin to put away your garden tools,” Smith says. “But while you're at it, remember to clean the tools, wipe the metal blades with oil, and store them under cover so they too are ready for next year.”
How to pick the perfect pumpkin
By Ron Wolford, Horticulture Educator, Illinois Extension
When you think of Halloween, you may think trick-or-treating and fall, but you likely also think pumpkins.
Illinois is the top pumpkin-producing state in the U.S., says Ron Wolford, University of Illinois Extension horticulture educator.
“In 2018, Illinois pumpkin farmers produced an estimated 500 million pounds of pumpkins,” he says. “The town of Morton claims to be the Pumpkin Capital of the World, with 82% of the world's canned pumpkin processed there.”
Although jack-o’-lantern pumpkins are edible, other squash varieties have better texture for making pies, soups, and breads. The world's largest pumpkin pie was made at the New Bremen, Ohio, Pumpkin Fest in 2010. The pie was 20 feet in diameter and weighed 3,699 pounds.
Pumpkins are grown on every continent except Antarctica. The largest pumpkin on record was grown in 2016 and weighed 2,624 pounds.
Tips for selecting the perfect pumpkin for carving
- Choose a pumpkin with a stem at least 1 to 2 inches long. Never carry it by the stem.
- Select a pumpkin with a flat bottom, so it will stand upright.
- Avoid pumpkins with holes, cuts or soft spots. These areas will decay.
- Use the thumbnail test. Press your thumbnail into the pumpkin, if your nail makes a scratch in the pumpkin, do not select.
- Color is also important. Light-colored pumpkins are easier to carve because the skin is not as hard as darker ones, but they will not keep as well.
Before carving or display, wash the pumpkin with warm water and let it dry. The pumpkin will last longer in a cool place. After carving, coat the inside of the pumpkin and the cuts with petroleum jelly. A pumpkin cut for Halloween will last seven to 10 days depending on weather conditions.
Avoid using candles to light a pumpkin because the heat will cook the flesh, shortening its lifespan.
For more information about pumpkins, check out the Illinois Extension website Pumpkins and More.
