Plant asters for unique display of fall color
By Brittnay Haag, horticulture educator
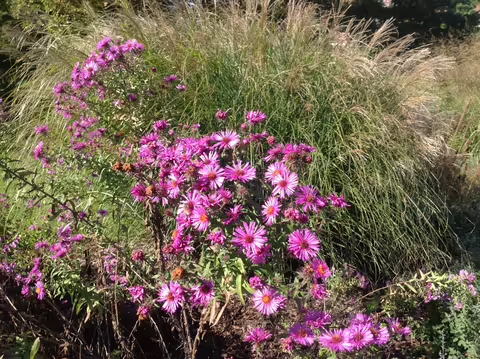
Fall gardens may need some added pops of color this time of year to maintain beauty and diversity until winter arrives. Asters are a late-blooming, pollinator friendly flower that looks great in the garden and in a fall floral display.
Think beyond the obvious, fall-blooming favorite mums this year. Select a gorgeous, full-of-color aster instead.
There are 180 species of aster, many of which are native to Illinois. Their dainty, daisy-like flowers range in color from purple, white, pink, and red, all with bright yellow centers. New England aster, Symphyotrichum novaeangliae, and aromatic aster, Symphyotrichum oblongifolium, are two easy-to-find favorites.
Where to Plant Them
Asters grow best in full sun to partial shade areas with well-drained soils. They are typically perennials in Illinois gardens, but need to be in the ground at least six weeks before it freezes to develop a good root system and overwinter successfully.
Varieties can vary in height from 6 inches to 6 feet. Taller varieties can be pruned back by a third several times throughout the summer, stopping in late July, to create a more compact plant. This will also increase the number of blooms on the plant.
Asters will begin to bloom when the days get shorter in late summer to early fall. They are short-day plants, like mums, meaning they need long periods of darkness to initiate flower buds.
Beware, it is normal for the lower leaves to turn brown and dry up when the plant is in full bloom.
Care and Dividing
To prevent asters from self-seeding throughout the garden, cut back the plant to about 2 inches above ground level after the first hard frost has turned the foliage brown. Gardeners can also choose to leave the plant and developing seeds for winter interest and for the birds to enjoy.
To keep asters tidy and healthy, divide the plants in early spring every two to three years, or when the center dies out. Some varieties are unfortunately prone to powdery mildew, which can be reduced with good air circulation and watering in the morning at the base of the plant.
A bee and butterfly favorite, asters are a great source of fall nectar for pollinators traveling on their fall migration. While most flowers have already finished blooming, asters are just starting their show in the garden.
They serve as the larval host plant for several butterflies and moths, including painted lady butterflies.
Asters also make great cut flowers for mixed fall arrangements. Arrange them with bright yellow goldenrod and ornamental grasses for a stunning autumnal décor display.
For more information on garden care, find a local Extension expert at go.illinois.edu/ExtensionOffice.
Gardener's Corner is a quarterly newsletter from the Illinois Extension team of horticulture experts. Each issue highlights best practices that will make your houseplants, landscape or garden shine in any season.
How will you grow? Join the Gardener’s Corner email list and get direct access to timely tips!
Small bees attracted to small flowers
By Kelly Allsup, horticulture educator
While the bumblebee is likely the most well-known pollinator, pollinators come in a variety of shapes, species, and sizes.
Many entomologists believe the tiny sweat bee nectaring on your flowering weed is just as important to a healthy ecosystem as the more well-known bumble bee and honey bee.
Gardeners and homeowners can make a space more attractive to the small pollinators of Illinois by planting miniature flowers. These little bees, about the size of an ant, love pollinating miniature flowers in an urban environment where there is usually more floral diversity than in rural areas.
When spring comes, instead of cutting your garden back to the ground, consider removing only the top of the stems to encourage opportunistic bees like small carpenter bees to make nesting cells to overwinter in.
Small Bees to Look For
Small sweat bees, Lasioglossum, are dark brown, gray, black, or metallic with hairs on their legs and abdomen giving them a fuzzy appearance. These pollinating bees nest in bare ground that has loose soil. They nest individually, but there may be multiple nests in one area.
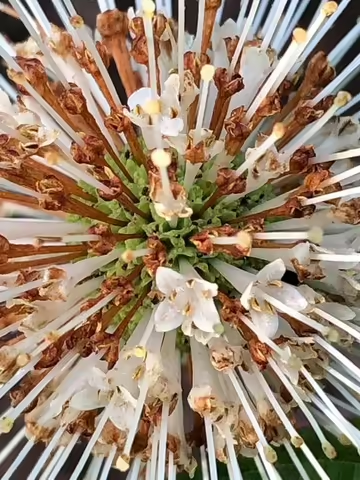
Small sweat bees are especially attracted to a much-beloved Illinois native shrub, button bush, or Cephalanthus occidentalis.
Button bush boasts minuscule tube-shaped florets on a globular white seed head in the middle of summer, followed by an ornamental red seed head. This large shrub grows to about 6 to 8 feet and can form thickets in wet environments.
Yellow-faced or masked bees, Hylaeus, are dark bees that look like wasps with their yellow or white face markings. Lacking the hair of typical pollinating bees, these tiny bees ingest pollen and nectar, then regurgitate the mixture in nesting cells to feed larvae when they hatch.
This pollinator emerges in the late spring when the bold flowers of golden alexanders, Zizia aurea, begin to bloom and remains active until the compound flowers of goldenrod, Solidago spp, start to fade. Yellow-faced bees can be seen pollinating the miniature white and purple flowers of common mountain mint, Pycnanthemum virginianum. These small flowers are arranged in clusters that bloom in late summer.
Small carpenter bees, Ceratina, which are black and metallic blue, excavate the center of small stems in the garden. They have fine pollen-collecting hairs on their legs and carry pollen and nectar back to the nest within the stem.
Small carpenter bees are attracted to small flowers of spring-blooming pussy willow, Salix spp, and summer-blooming yarrow, Achillea millefolium. Yarrow flowers cannot pollinate themselves and rely on the service of small bees.
For more information on how to support pollinators, contact a local Extension horticulture expert at go.illinois.edu/ExtensionOffice
Gardener's Corner is a quarterly newsletter from the Illinois Extension team of horticulture experts. Each issue highlights best practices that will make your houseplants, landscape or garden shine in any season.
How will you grow? Join the Gardener’s Corner email list and get direct access to timely tips!
Tips for planting balled-burlapped trees for long-term health, success
By Christopher Enroth, horticulture educator
Fall is a great time to plant trees, many of which are originally grown at a nursery either in a plastic container or in the ground before they are balled and burlapped. How the tree is grown in its first years and then planted affects the long-term health of the tree.
Balled-and-burlapped trees are still widely used especially for planting larger nursery stock.
What are Balled-and-Burlapped Trees?
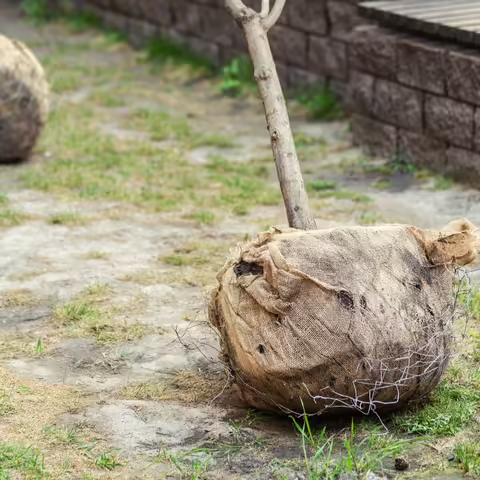
Balled-and-burlapped trees are grown in ground at the nursery. When it is time to sell the tree, a large machine called a tree spade digs up an intact root ball. However, many of the smaller roots are lost when the tree spade pulls up the root ball. Up to 90% of the entire root system may be lost as the tree is removed from the ground.
The root ball is then wrapped in burlap and set in a wire cage that is tied tightly to keep the root ball intact while it is moved to the planting site.
Once at the planting site, the debate about the next steps begins. Either the tree can be planted with the wire cage and burlap still in place, or the wire cage can be removed and the burlap cut or rolled down, exposing at least the top third of the root ball.
Does Burlap and Wire Help or Hinder Trees?
Those arguing for leaving on the burlap and wire cage say it helps with establishment by guaranteeing the root ball is not disturbed and protecting any remaining roots. It also maintains the soil structure around the root system. If the burlap used is natural, the fibers will decompose and the tree will grow around the wire cage. Removing the materials takes installation crews longer, which leads to greater expense.
On the flip side, some contend that leaving the burlap and wire cage on negatively affects the long-term health of the tree. Leaving the burlap on hinders root development into the native soil. Burying the burlap slows its decomposition making it a barrier for much longer than expected.
If the tree is an unstoppable force, then the wire cage is like an immovable object the tree cannot grow around. Eventually, the tree will conflict with the cage and may grow around it, but could possibly become girdled.
In the scientific studies comparing the two methods for planting balled and burlapped trees, researchers found little difference in the overall growth and health of the trees in both situations. However, time is a major factor
If all goes as planned, a newly planted tree is expected to out-live the gardener. But scientists need to publish their data while still alive so very few long-term studies exist.
Examining the arguments for and against removing the material from a balled-and-burlapped tree, it seems to be a trade-off between successful establishment and long-term health.
Post-Planting Tree Care
This entire debate is secondary to other tree planting and care items, such as watering and pruning for future tree structure. Without basic tree care, it won’t matter whether the burlap was left on or not.
The following steps are great recommendations to follow when planting new balled-and-burlapped trees.
- Remove and discard any twine on the base of the tree and the basket.
- Pull back burlap from the top of the root ball.
- Remove soil from the top of the root ball to find where the trunk starts to flare outward. If no flare is found, which is common on conifers, remove the soil to the topmost root.
- Remove the top one-third of the wire basket.
- Pull back or remove burlap in the top one-third of the basket.
- Backfill soil, filling in all air pockets.
- Stake the tree if necessary
Gardener's Corner is a quarterly newsletter from the Illinois Extension team of horticulture experts. Each issue highlights best practices that will make your houseplants, landscape or garden shine in any season.
How will you grow? Join the Gardener’s Corner email list and get direct access to timely tips!
Some trees weather wet soils, floods better than others
By Andrew Holsinger, horticulture educator
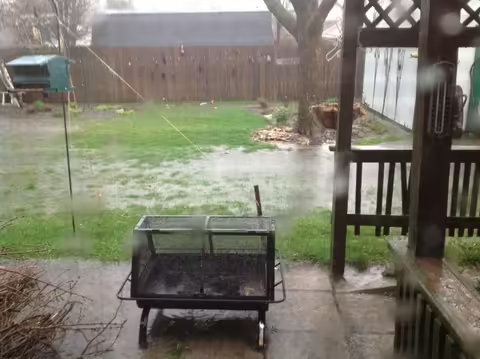
The splendor of trees and shrubs comes from what is above ground, but don’t forget about what lies beneath. Poorly drained areas, easily identified after a downpour of rain, are not suitable for some trees or shrubs.
Soil plays a vital role in the survival of trees and shrubs in the landscape.
Planting the right trees and shrubs in poorly drained sites has many benefits. Roots take up excess water and promote improved soil filtration. Reducing standing water can help decrease mosquito populations and create a more pleasurable environment. Surface drainage may be preferred over sub-soil drainage, which is limited or slow. Moving the water away is a great start.
Tree placement and Care
When deciding on a new tree for a wet area, think up and down, imagining both the mature canopy and the expansion of the root system.
Trees that do well in wetter soils often have a shallower root system, so be prepared to find those roots at or near the surface as the tree matures.
Placement will be pivotal for tree success, especially when planting in wet soils. Soil texture, or the ratio of sand, silt, and clay in the soil, influences soil moisture retention. Soil texture also influences aeration, how air moves through the soil. Avoid heavy clay soils, which have poor aeration and drainage, and hardpan soil, which is underlaid with rocky material that can interfere with root development.
Do not plant trees in wet areas in the fall. One threat to planting in wet soils is frost heaving, an upward swelling of the soil during freezing conditions caused by ice formation in the pore spaces of soils.
Plant trees and shrubs on wet sites during the early spring to ensure a full season of growth and reduce the likelihood of frost heaving that happens with a fall planting.
Other placement considerations include precipitation patterns and poorly-timed or located irrigation systems. Downspout rain discharge may also influence the suitability of a planting site.
Looking at the distribution of trees in the wild can also help guide plant selection. However, some species such as bald cypress or black gum can adapt to heavy moisture and other growing conditions that may not occur where they are naturally found.
Research to find out what the requirements for moisture are when selecting trees and shrubs. Prior performance will also indicate what trees or shrubs may be successful in your landscape.
Know Before You Grow
It is much more cost-effective to plant the right species for the location than to try to adjust the site conditions.
Trees and shrubs that thrive in wet sites include:
- Downy serviceberry, Amelanchier arborea
- River birch, Betula nigra
- American hornbeam, Carpinus caroliniana
- Common hackberry, Celtis occidentalis
- Dawn redwood, Metasequoia glyptostroboides
- Black gum, Nyssa sylvatica
- Bald cypress, Taxodium distichum
- Buttonbush, Cephalanthus occidentalis
- Gray dogwood, Cornus racemose
- Redosier dogwood, Cornus sericea
- Spice bush, Lindera benzoin
Gardener's Corner is a quarterly newsletter from the Illinois Extension team of horticulture experts. Each issue highlights best practices that will make your houseplants, landscape, or garden shine in any season.
How will you grow? Join the Gardener’s Corner email list and get direct access to timely tips!
Fall is for feathered friends, fireplaces
By Richard Hentschel, horticulture educator
Birdseed and firewood are two common topics that show up every fall. Both take some planning to be successful.
Feeding Birds in the Winter
Feeding the birds means starting earlier than later. Birds need to know early on that there will be something to eat on a regular basis if you want them to hang around in your yard.
With the recent outbreak of songbird deaths, Illinois officials are not currently recommending removing feeders, but stress cleaning and sanitizing feeders every two weeks and hummingbird feeders weekly.
Choose the Right Birdseed
Buying birdseed that has a little bit of everything for every bird can add up to a lot of wasted seed on the ground. Consider putting out seed that will attract only your favorite birds. This can be more cost-effective as the unwanted seed will feed four-legged critters, not to mention make a mess on the patio or in the lawn.
The type of birdseed chosen will also help determine the kind of feeder needed. Typically, feeders are designed for the size of seed being distributed — thistle versus sunflower, for example.
You may end up with several feeders catering to a variety of your favorite birds.
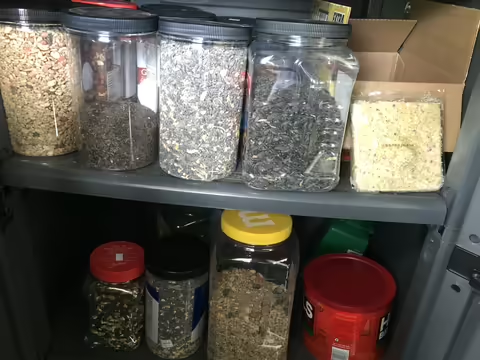
Birdseed can be a feeding source for pantry pests such as the Indian Meal Moth, so keep seed securely covered and consider storage in a cool garage.
Most think of feeding birds, fewer think about supplying water, too. Consider birdbaths that have a heating element to keep them from icing over in the winter.
Seasoning and Storing Winter Firewood
Now on to firewood. It is never a good idea to burn “green” firewood in the home fireplace as it will take heat away from the room and can add substantially to the creosote buildup in the chimney. Outdoors it can make for so much smoke it is impossible to sit close enough to enjoy the fire.
It may not be critical to have the best firewood to burn in an outdoor fire pit, but it is an entirely different story for the indoor fireplace.
Seasoned firewood means the wood, for logs more than 6 inches, has been cut, split, and dried for a long time. Clues that the wood is seasoned are a gray color on the ends of a log and checkmarks showing moisture loss.
Firewood should be around 20% to 25% moisture to burn well and limit smoke. Those who purchase well-seasoned wood need to keep it dry before burning it.
Make the woodpile easy to uncover and recover, or you will find yourself leaving the cover off and allowing the firewood to reabsorb the water you paid to remove.
As a rule, the heavier the firewood, given the same moisture content, the more heat it will give off. This is something to consider if there are different tree species available to purchase.
Once the home fireplace is being regularly used, only bring in the amount of firewood expected to be used in a week. It takes more than a week to “thaw out” any outdoor insects that have hidden in cracks and crevices on the bark.
This practice will keep the insects from wandering around your home and, while not likely to do any damage indoors, will keep family peace.
As an additional precaution, when stacking firewood next to the outside wall of a home, leave a few inches between for good air movement and an extra barrier for insects.
More information about cutting, purchasing, and burning firewood is available at go.illinois.edu/Firewood.
Gardener's Corner is a quarterly newsletter from the Illinois Extension team of horticulture experts. Each issue highlights best practices that will make your houseplants, landscape, or garden shine in any season.
How will you grow? Join the Gardener’s Corner email list and get direct access to timely tips!
Healthy gardens start with sensible soil testing
By Sarah Vogel, horticulture educator
As the growing season wraps up and gardeners put vegetable beds to rest and clean and store tools for the winter, there is one task they may be forgetting. Testing the soil’s nutrients can provide a better understanding of a garden’s health and save money in the long run.
Over time, soil fertility, pH, and even soil structure can change as nutrients are depleted. Testing soils will identify missing nutrients that can then be addressed as needed. Unless there is a specific issue being remedied, soil should be tested every three to five years.
Fall is a great time for gardeners to test since soil temperatures are still above 50°F and the growing season is slowing down. Any added organic matter will then decompose, and nutrients will filter into the soil over winter well before planting season.
Depending on the soil’s natural fertility and what is being grown in it, plants can perform well for years without needing fertilizer. While fertilization can help with plant vigor and vitality, experts recommend first establishing a need and purpose for fertilizer. Understanding soil nutrient concentrations before applying fertilizer is important in a sustainable landscape.
If fertilizer is not necessary, why waste product and time applying it? Overfertilization can harm trees, shrubs, and even turfgrass, especially during drought conditions.
Excess fertilizer can also end up in waterways and lead to aquatic life and water quality issues.
What do Soil Tests Tell Gardeners?
A basic soil test will measure soil pH and organic matter as well as macronutrients such as phosphorus, potassium, sulfur, calcium, and magnesium. Nutrients are most readily available to plants when the soil pH is between 6.5 and 7 and most horticultural crops do well in the range of 6 to 6.8. Many soil testing labs will also measure amounts of micronutrients such as boron, copper, iron, or manganese.
If you are concerned about soil contaminants, such as lead in an urban site, contact the soil lab about specific instructions and additional costs.
Since soil samples must represent an entire yard or garden, take several core samples from evenly distributed spots and then mix them together. Remove any roots, rocks, or twigs. Gardeners can use a soil probe, sharp spade, or trowel to gather soil, taking care to remove the same amount for each sample. If comparing soils, such as a seemingly fertile soil and one that does not produce well, take and test two separate samples.
Home soil test kits are widely variable and not recommended. There are several soil testing labs in Illinois. Labs vary in pricing and services, so call before mailing soil samples.
Many labs will provide interpretation of the soil test results upon request and Illinois Extension horticulture staff can provide further guidance. Locate a local county Extension office go.illinois.edu/ExtensionOffice.
Along with soil testing, preventative plant care can reduce the need for not only fertilizers, but herbicides and pesticides as well. Most healthy trees and shrubs do not need fertilizers once they are mature and native annuals and perennials are more suited to local soils than non-native species reducing the need for fertilizer. Established lawns benefit from cultural practices such as using disease-resistant varieties, soil aeration, over-seeding, and mowing at the correct height with sharp mower blades.
Gardener's Corner is a quarterly newsletter from the Illinois Extension team of horticulture experts. Each issue highlights best practices that will make your houseplants, landscape, or garden shine in any season.
How will you grow? Join the Gardener’s Corner email list and get direct access to timely tips!
Proper maintenance extends lifespan, save money on garden tools
By Mary Fischer, horticulture educator
One of the pricier expenditures for home gardeners is quality hand tools. High-quality tools will last longer, but this does mean the tools — whether shovels, rakes, pruners, or hand trowels — cost more.
Buy the best you can afford. Take care of your tools, and they will take care of you. This takes time and effort, but can extend the life of your investment.
With winter coming up, make sure to clean, oil, and sharpen tools before storing them for the season.
Store Garden Tools Properly
The first step to tool maintenance is proper storage. Do not leave tools outside where they can absorb moisture from wet grass and dew. Instead, store tools off the ground and away from potential moisture, such as in a shed, barn, or garage.
- Long-handled tools can be stored conveniently on hanging racks or tool holders, which helps prevent damage to sharpened edges and keeps the tools organized. Often more than one tool can be hung in a small area.
- Short-handled or hand tools can be stored using a pegboard system.
- An outline of the tool drawn on the pegboard can help identify a missing tool. If a tool is missing, check outside. Attach bright marking tape to the handle of tools to spot them more easily outdoors.
Maintenance and Care
Garden tools are typically exposed to soil and moisture. To preserve tools and keep them in proper working order, it is extremely important for tools to be clean and dry before storing.
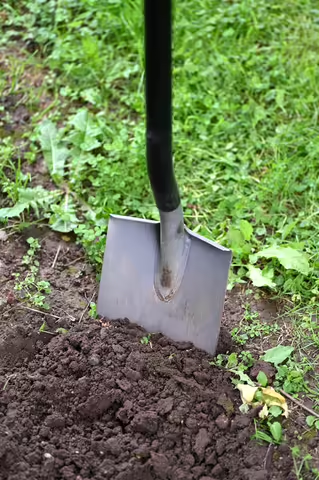
Use a wire brush, paint scraper, or a strong blast from a hose to remove caked-on soil from shovels and hand trowels. Wipe small hand tools, such as pruners or shears, to remove any sap or moisture from the blades. Turpentine, alcohol, or mineral spirits can remove stubborn sap. Fine steel may be used, if needed.
Once clean and dry, apply an oil-based protective coating to any metal surfaces to prevent rust. If desired, use a good quality spray paint to protect metal surfaces. Wear appropriate personal protective equipment to protect eyes and hands while doing this.
Wooden handles should be free of rough areas. Sanding will help smooth out these spots. To maintain the life of the wooden handles, apply a protective coating using boiled linseed oil, oil from dried flax seeds. Polish smooth with a dry soft cloth.
Good quality hand pruners can be disassembled for cleaning and sharpening. Many pruner manufacturers have replaceable blades. Use a wire brush, sandpaper, or steel wool and a good deal of effort to remove dirt, rust, and sap from pruner blades.
It’s very important to examine the blades for any damage due to cracks, nicks, or burrs. The beveled edge of the blade should be sharpened at the same angle as the bevel.
Before storing tools away for the winter, sharpen any dull tools used for digging or pruning and file down any nicks. When it comes to sharpening, tools such as whetstones or files, are a matter of personal preference and ability.
Whetstones come in different gradations and sizes. A longer stone may be easier to use for garden tools. Whetstones require a lubricant such as 3-in-1 oil.
Diamond-coated flat files can last a lifetime and only require water for lubrication. For a quick sharpening job during the season, try a ceramic sharpener. Another quick fix is a bastard file.
It is not advisable to use power grinding stones. Heat generated through friction can make the metal brittle.
Once tools are sharp, coat the blade or metal surface lightly with an oil lubricant such as WD-40.
Gardener's Corner is a quarterly newsletter from the Illinois Extension team of horticulture experts. Each issue highlights best practices that will make your houseplants, landscape or garden shine in any season.
How will you grow? Join the Gardener’s Corner email list and get direct access to timely tips!
Don't rake fall leaves, recycle them
By Nancy Kreith, horticulture educator
Every fall, an onslaught of leaves drop relentlessly into yards leaving homeowners to rake, bag, and haul them out on the curb. But what many don’t know is that those golden-hued leaves are gold in the garden.
After raking leaves this fall, think about recycling them on your property rather than bagging them for curbside pick-up.
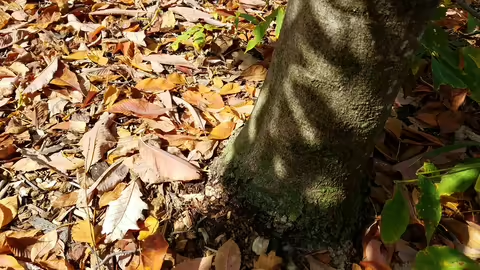
Fallen leaves are one of the most readily available forms of organic matter for home gardeners. Decomposing leaves increase organic matter in the soil, can be used as mulch for garden beds and lawns, and are a valuable addition to compost piles.
Ways to Recycle Leaves
Break down leaves with a leaf shredder or mulcher. Or, run over raked leaves with a lawnmower to cut them into smaller pieces. This initial breakdown allows for improved air circulation and more surface area leading to quicker decomposition.
Be sure to separate diseased leaves from the leaves you plan to recycle or compost.
The rate of decomposition for leaves will depend on the leaf size, tree species, and moisture level. Brown leaves break down faster if they are shredded and moistened. If un-shredded leaves are applied as mulch, they tend to mat together and suffocate the soil or vegetation.
However, having matted leaves in a vegetable or annual garden bed in the fall will help smother winter annual weeds. In the spring, the leaves can be incorporated or tilled into the soil.
Another easy way to recycle leaves is by storing them in garbage bags with small holes that allows leaves to break down naturally. Wetting the leaves and having holes in direct contact with the earth, where more microbes are present, will speed up the decomposition process. The end result is referred to as leaf mold or partially decomposed leaves.
Leaf mold can then be used as mulch or saved as a carbon source for adding to your compost pile in the summer when there is less readily available "brown" materials.
Brown or dry materials are typically high in carbon and will help to balance the “green” or wet nitrogen-rich materials in a compost pile.
Why Not Leave the Leaves?
Leaves serve as a wonderful soil conditioner and increase organic matter in the soil, which has a variety of benefits. More organic material will increase the amount of microbial activity which includes beneficial bacteria, fungi and other microorganisms that aid in plant growth. Organic matter also coats finer clay particles in the soil providing more air space and binds sandy soils allowing for better water retention.
Ideal garden soils should test at 5% organic matter. A standard soil test will provide the percentage of organic matter in soil. For information on soil testing kits and labs, contact a University of Illinois Extension office at go.illinois.edu/ExtensionOffice.
By recycling leaves on your property, not only will you be improving your garden soil, you will also be making an environmentally conscious choice to keep your yard waste on-site rather than having it hauled off as waste.
To learn more about the basics of composting, visit extension.illinois.edu/global/composting-resources.
Gardener's Corner is a quarterly newsletter from the Illinois Extension team of horticulture experts. Each issue highlights best practices that will make your houseplants, landscape or garden shine in any season.
How will you grow? Join the Gardener’s Corner email list and get direct access to timely tips!
